Introduction
They say a man leaves the house with three things. Those would be wallet, keys and a phone. The catch is, that we are always searching for one of those three things around the house. For me, this is most often my phone. I tend to carry it around with me and misplace it somewhere in the apartment.
This is why I decided to create an automation in Home Assistant that would help me find my phone whenever it’s out of sight.
Implementation
The idea was simple: Trigger a loud sound on the phone after pressing a button on the Home Assistant dashboard. To build this we will need:
- Home Assistant: Since you are reading this, you probably already have it set up.
- Home Assistant Companion App: This app is essential for enabling notifications on your phone. You can download it from:
- Google Play Store for Android.
- Apple App Store for iOS.
After installing the Companion App, link your phone to Home Assistant. Once connected, your phone will appear in Settings > Devices & Services > Integrations > Mobile App.
Setting up the Home Assistant UI
The UI for this automation consists of a single button. Pressing it triggers the sound notification on your phone, making it quick to locate your device.
Creating the Button Helper
- Navigate to Settings > Devices & Services > Helpers in Home Assistant.
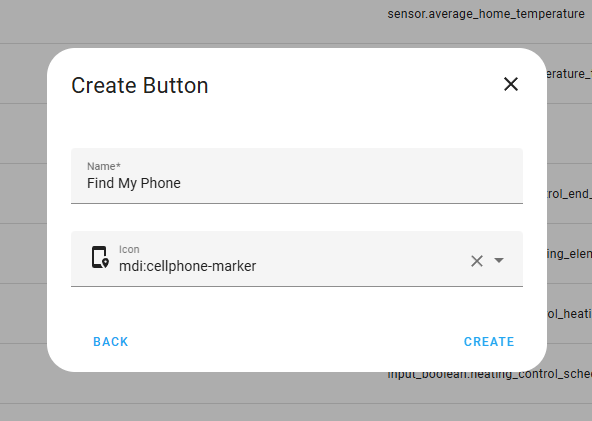
- Click Create Helper and choose the Button option.
- Set a name and an icon that suits the purpose, such as “Find My Phone” with a phone-related icon.
- Click Create to save the helper.
Adding the Button to Your Dashboard
- Open your preferred dashboard and click Add Card.
- Choose the Entities card from the list of card options.
- Find the button you just created (e.g.,
input_button.find_my_phone) and add it to the card.
That is all the UI setup required. Your dashboard should now display a button like this:

Setting up the Automation
With the button in place, it’s time to set up the automation that sends the notification to your phone. This involves creating an automation in Home Assistant that listens for the button press and triggers a notification.
Creating the Automation
- Open Home Assistant and navigate to Settings > Automations & Scenes.
- Click Create Automation and select Start with an empty automation.
- Switch to the YAML editor and paste the following code:
|
|
Customizing the Variables
At the bottom of the YAML, you’ll see a section called variables. Here’s what each variable does and how to adjust it:
target_device: The notification target, which should match your phone’s notification service. In this example,notify.mobile_app_vlade_pocorefers to my Android phone. Update this to match your device’s identifier.notification_channel: Defines the notification channel on Android. You can leave this asfind_my_phoneunless you have another channel with the same name. This setting is required in order to customize the default notification sound.notification_title: The title displayed in the notification. Customize it as desired.notification_message: The body of the notification message. Feel free to modify it to make it more fun or specific to you.
Final Steps
Before saving, ensure the entity_id in the triggers section matches the name of your button helper. For example, if you named your button differently, replace input_button.find_my_phone with the correct entity ID.
Testing the Automation
Once everything is set up:
- Save the automation.
- Return to your dashboard and press the “Find My Phone” button.
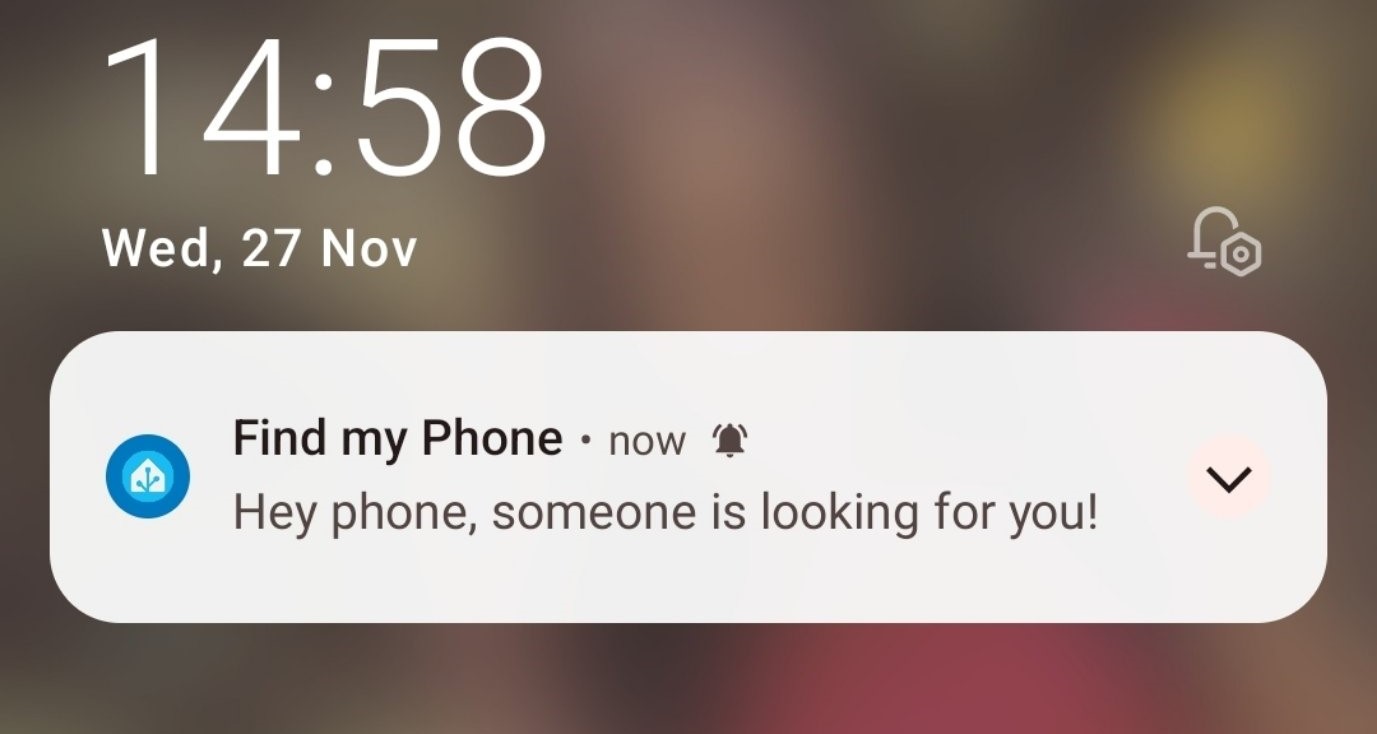
Please note that your phone has to be connected to your WIFI for this to work. If all is working correctly, you should see a notification on your phone like this:
Customizing the Notification Sound
You probably noticed that the received notification uses the default notification sound. This is not good enough, since we need a longer lasting sound. We can set this by using Notification channels.
Notification channels are an Android feature that allow you to customize how notifications behave, including their sound, vibration pattern, and priority. Here’s how you can use them to set a distinct sound for your “Find My Phone” notification:
-
Trigger a Test Notification
- First, press the button on your Home Assistant dashboard to send a notification to your phone. This ensures that the notification channel (
find_my_phone) is created if it doesn’t already exist.
- First, press the button on your Home Assistant dashboard to send a notification to your phone. This ensures that the notification channel (
-
Open Notification Settings
- Navigate to Settings on your Android phone.
- Go to Apps and find the Home Assistant app in the list.
- Tap Notifications to view all notification channels associated with the app.
-
Locate the Channel
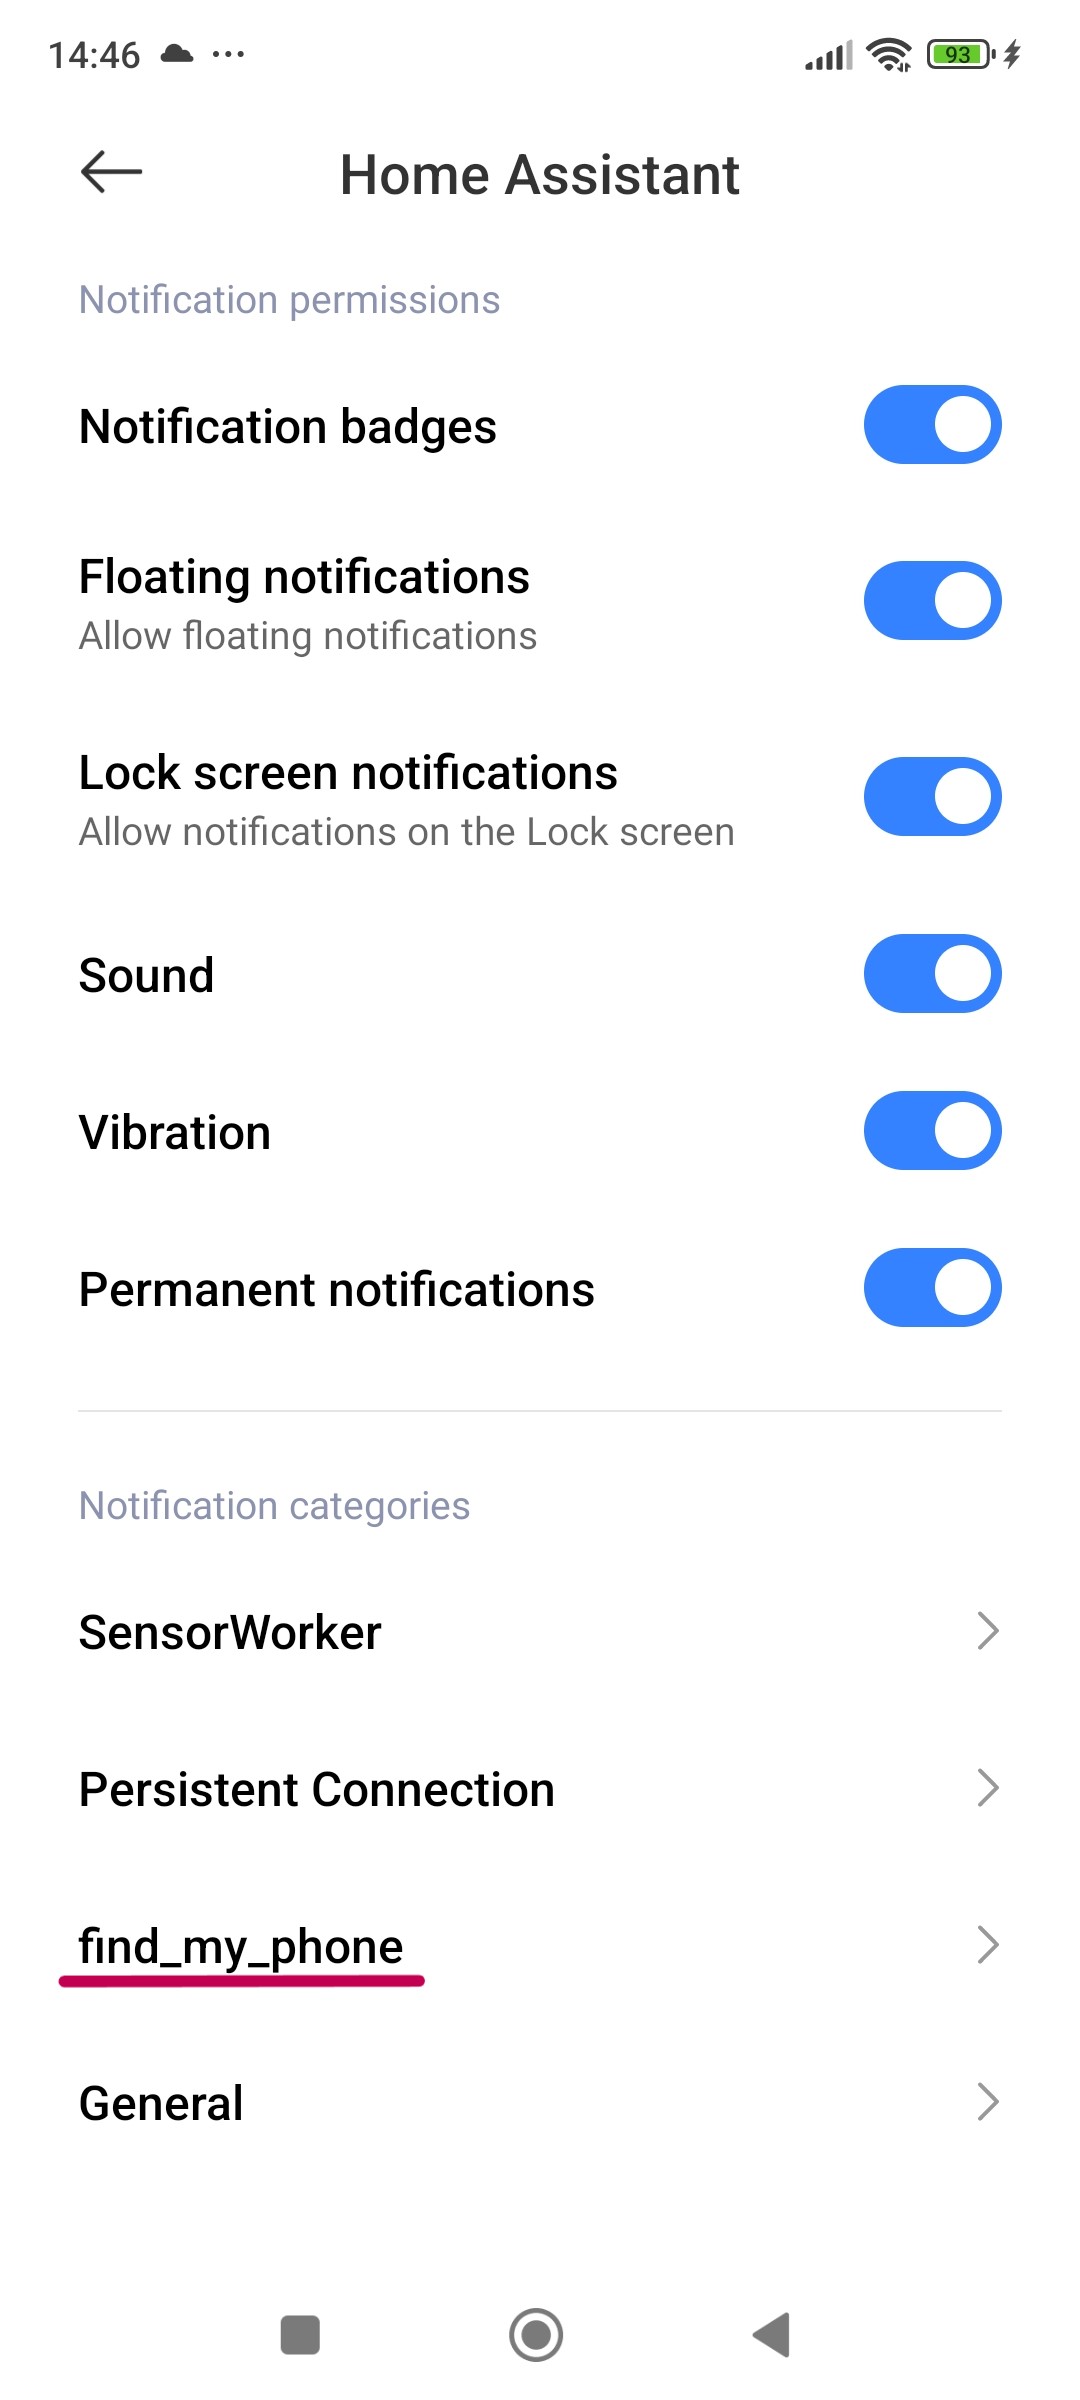
- Find the notification channel labeled
find_my_phoneunder Notification categories. If you don’t see it immediately, you may need to tap See all or Advanced settings to display all channels.
- Find the notification channel labeled
-
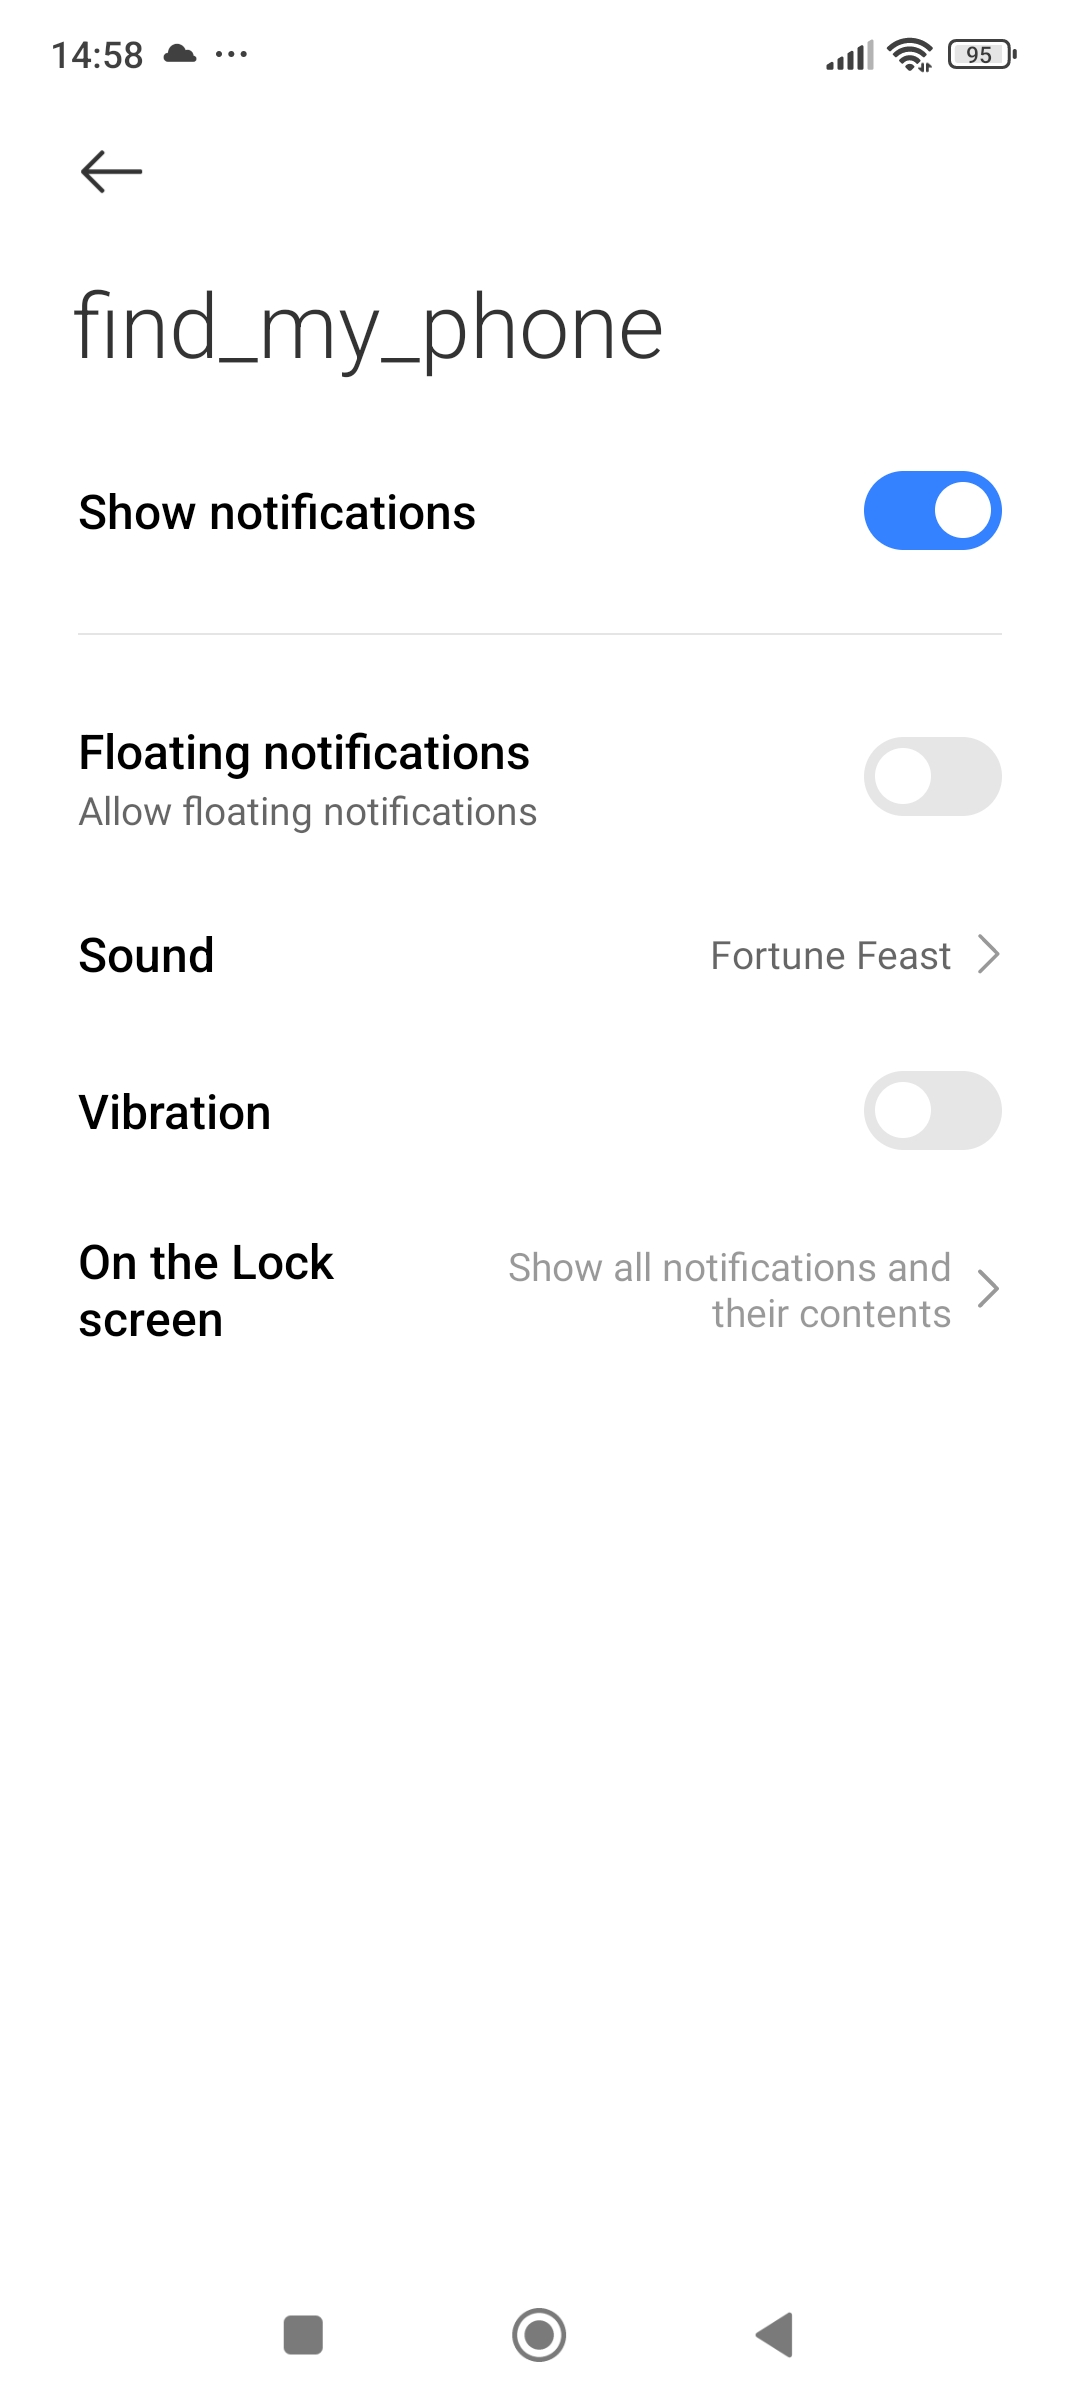
Customize the Sound
- Tap on the
find_my_phonechannel. - Choose Sound and select a unique sound from your phone’s library or add a custom sound file.
- You can also adjust other options, like vibration and visual indicators, to make the notification even more noticeable.
- Tap on the
-
Test the Changes
- Return to your Home Assistant dashboard and press the button again. Verify that the notification uses your customized sound.
Customize the notification delivery method
This is an optional step, but it may help if it takes too long for the notification to be delivered to your phone. Home Assistant Companion app uses Firebase Cloud Messaging (FCM) for notification delivery. I have found WebSockets to be more reliable and instant.
-
Access App Settings
- Open the Home Assistant Companion app on your Android phone.
-
Navigate to Connection Settings
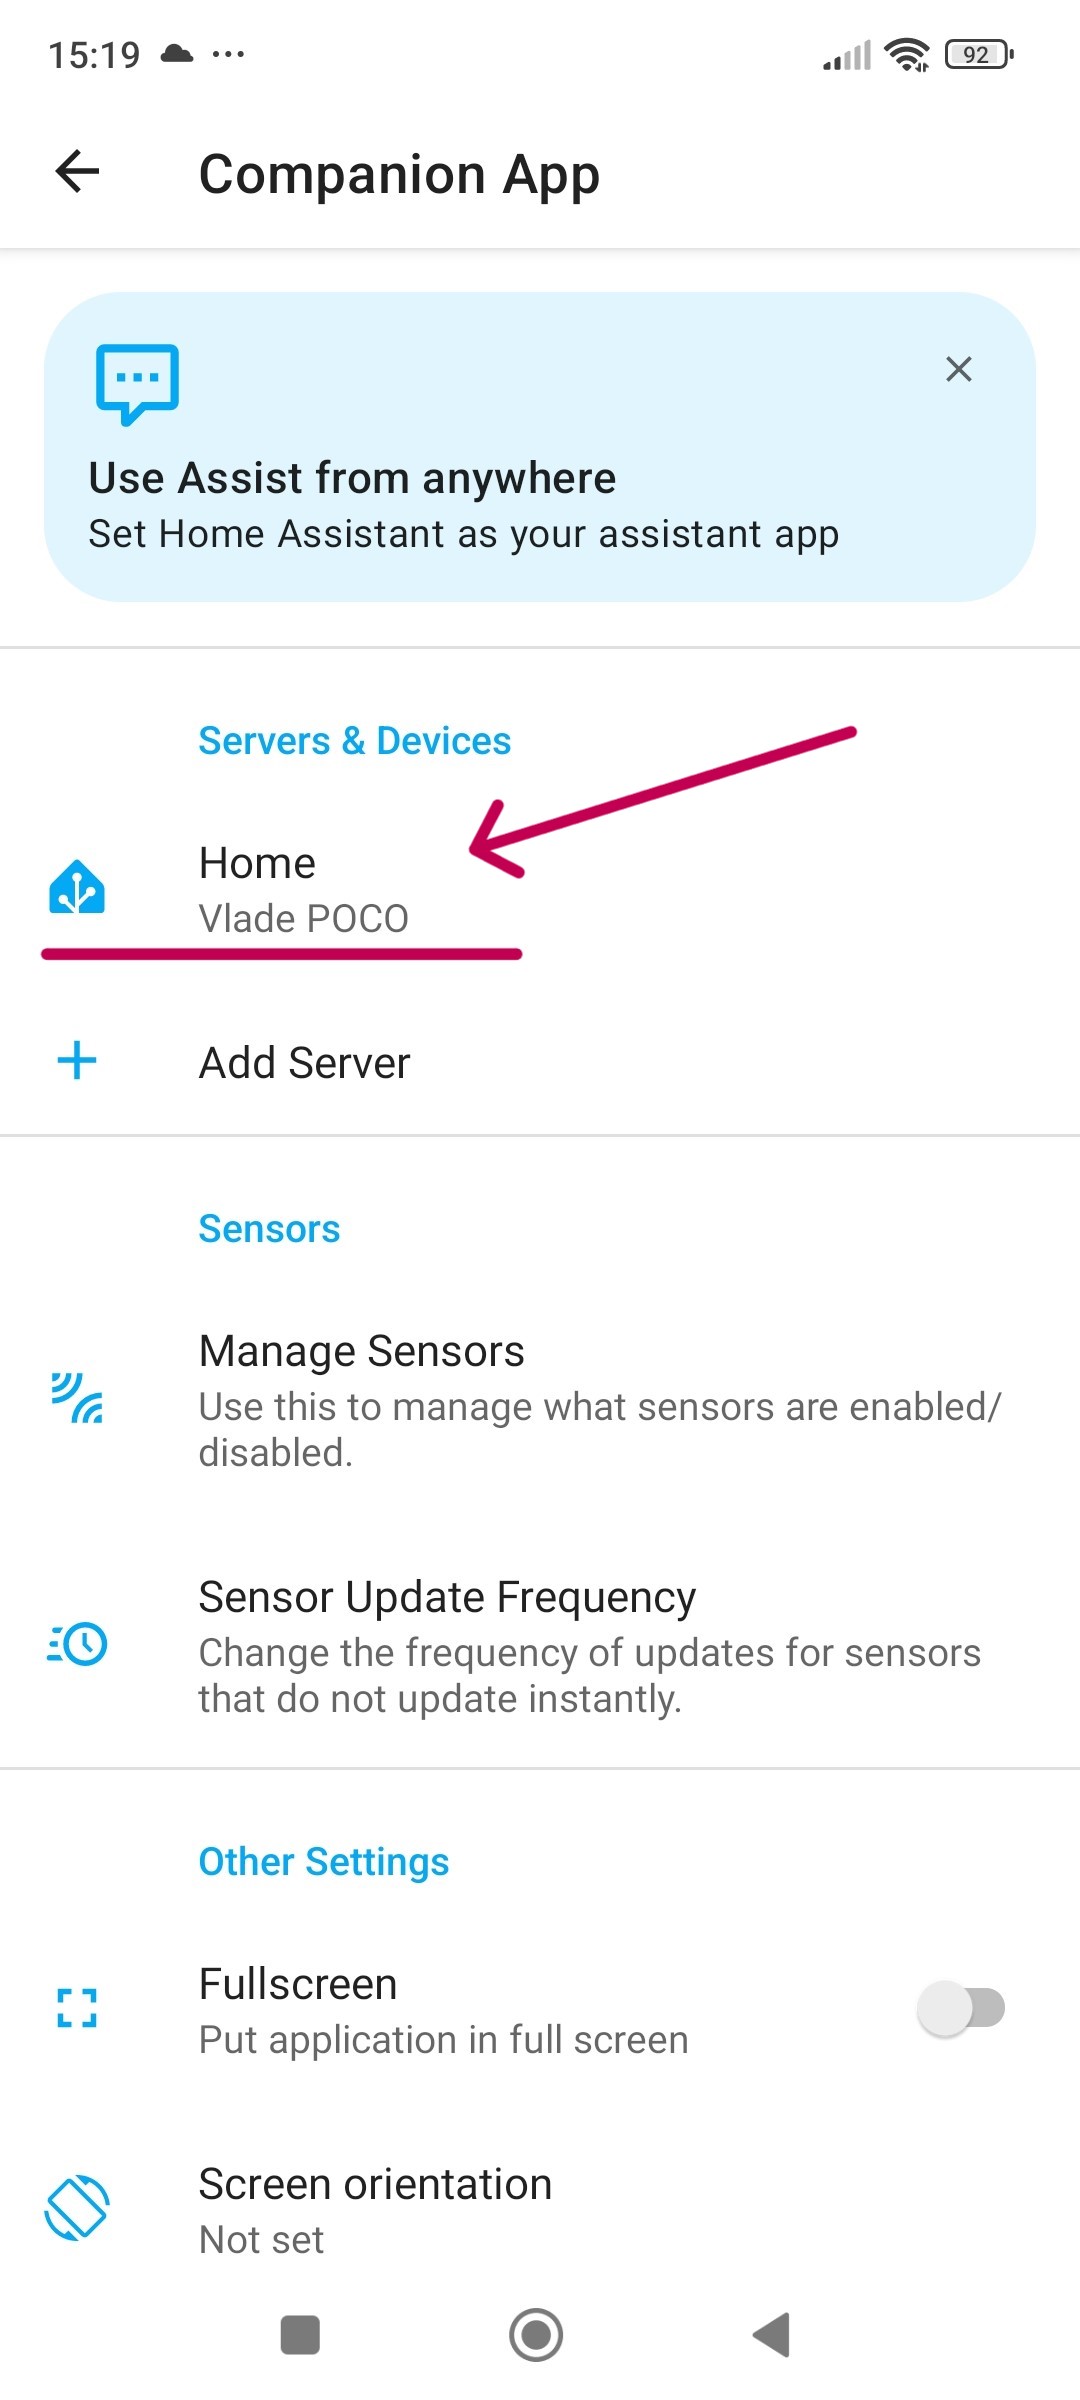
- Tap the Settings menu (gear icon).
- Scroll down to the Companion App section.
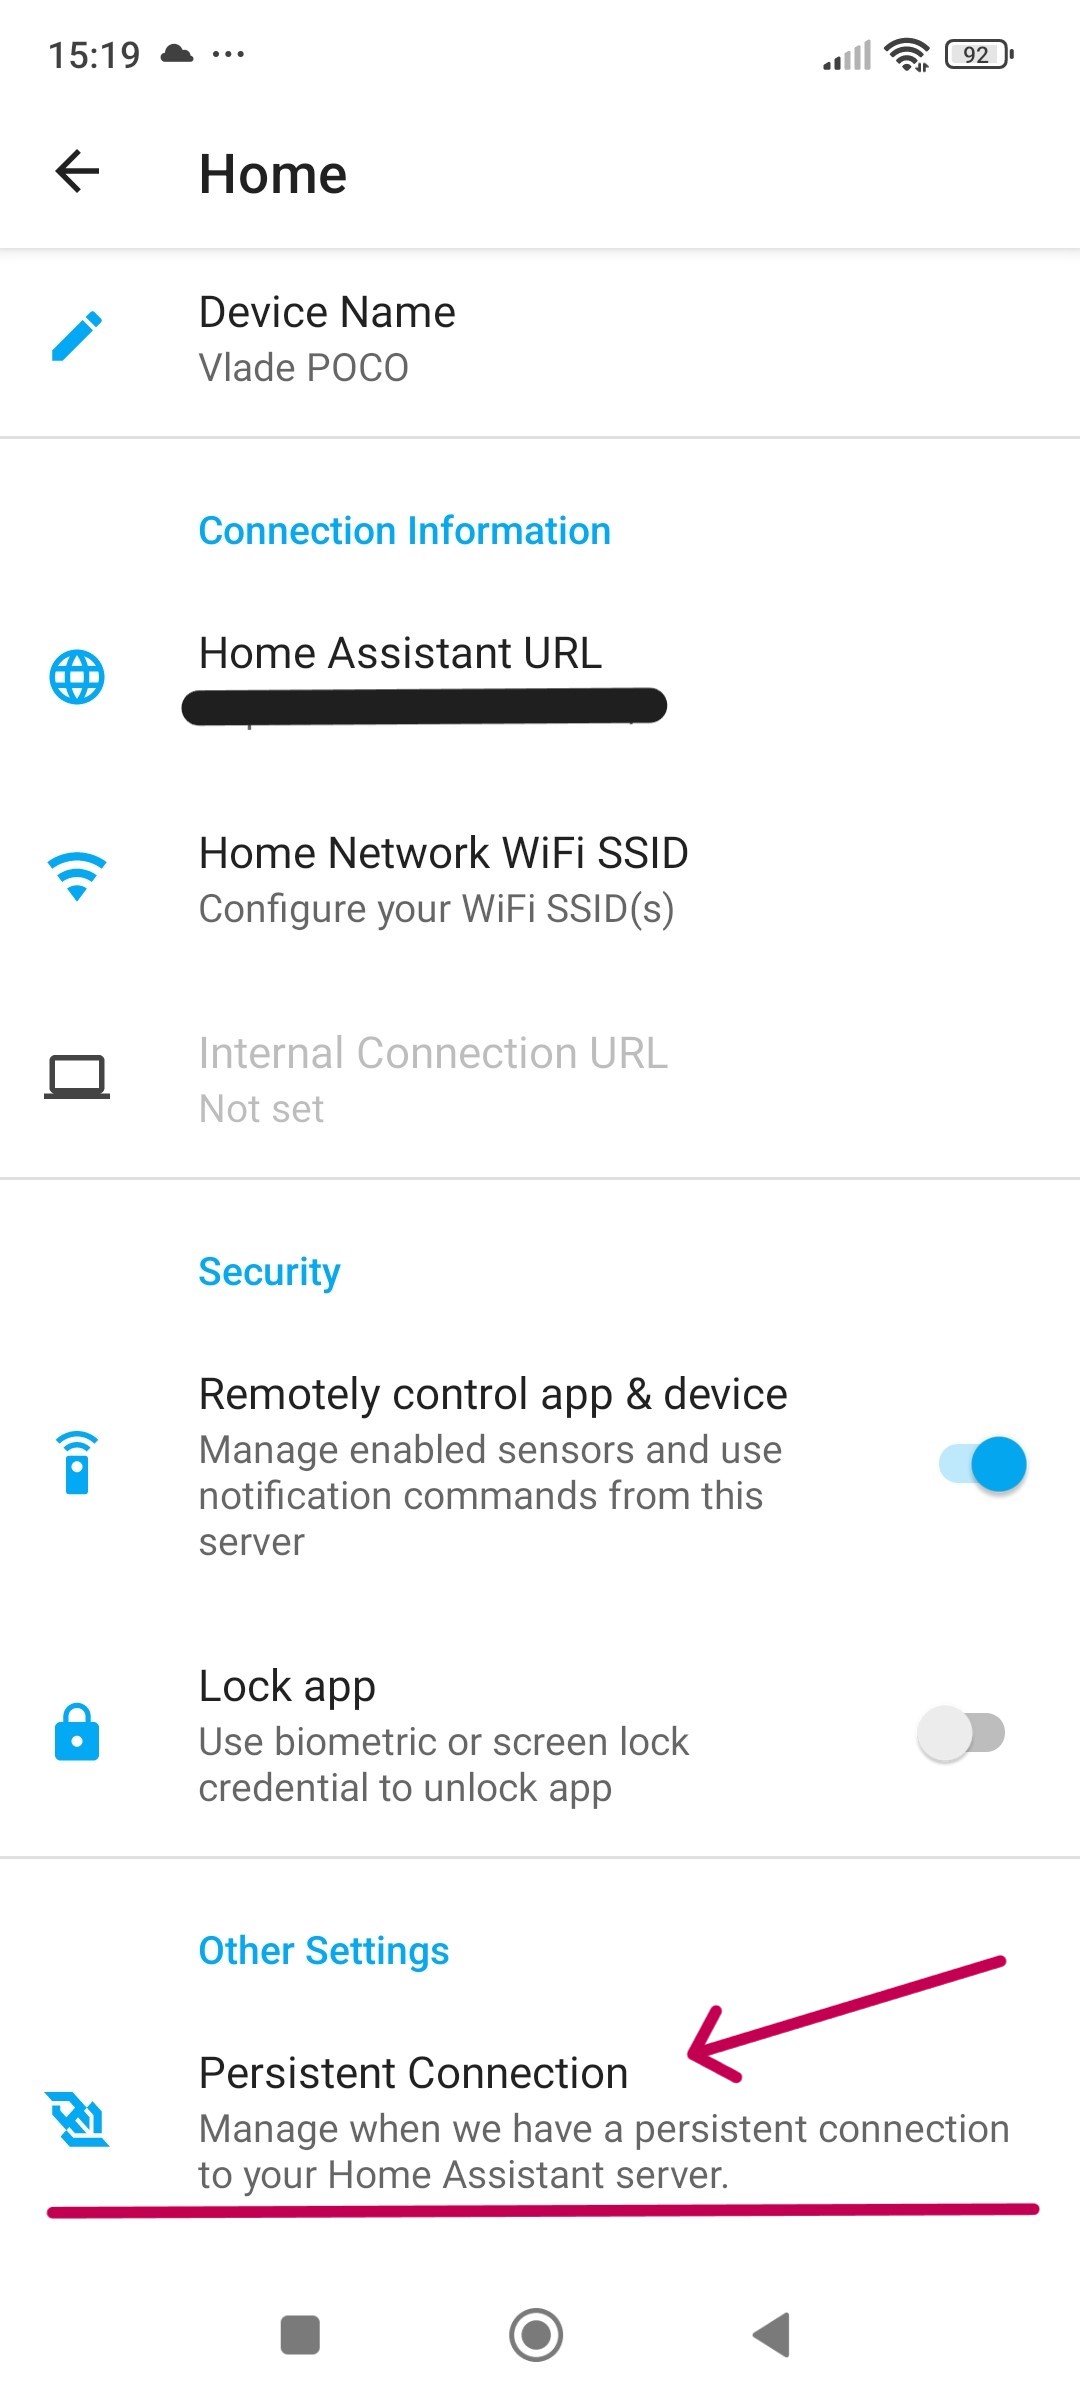
- Tap on your Home Assistant server
- Scroll down and select Persistent Connection.
-
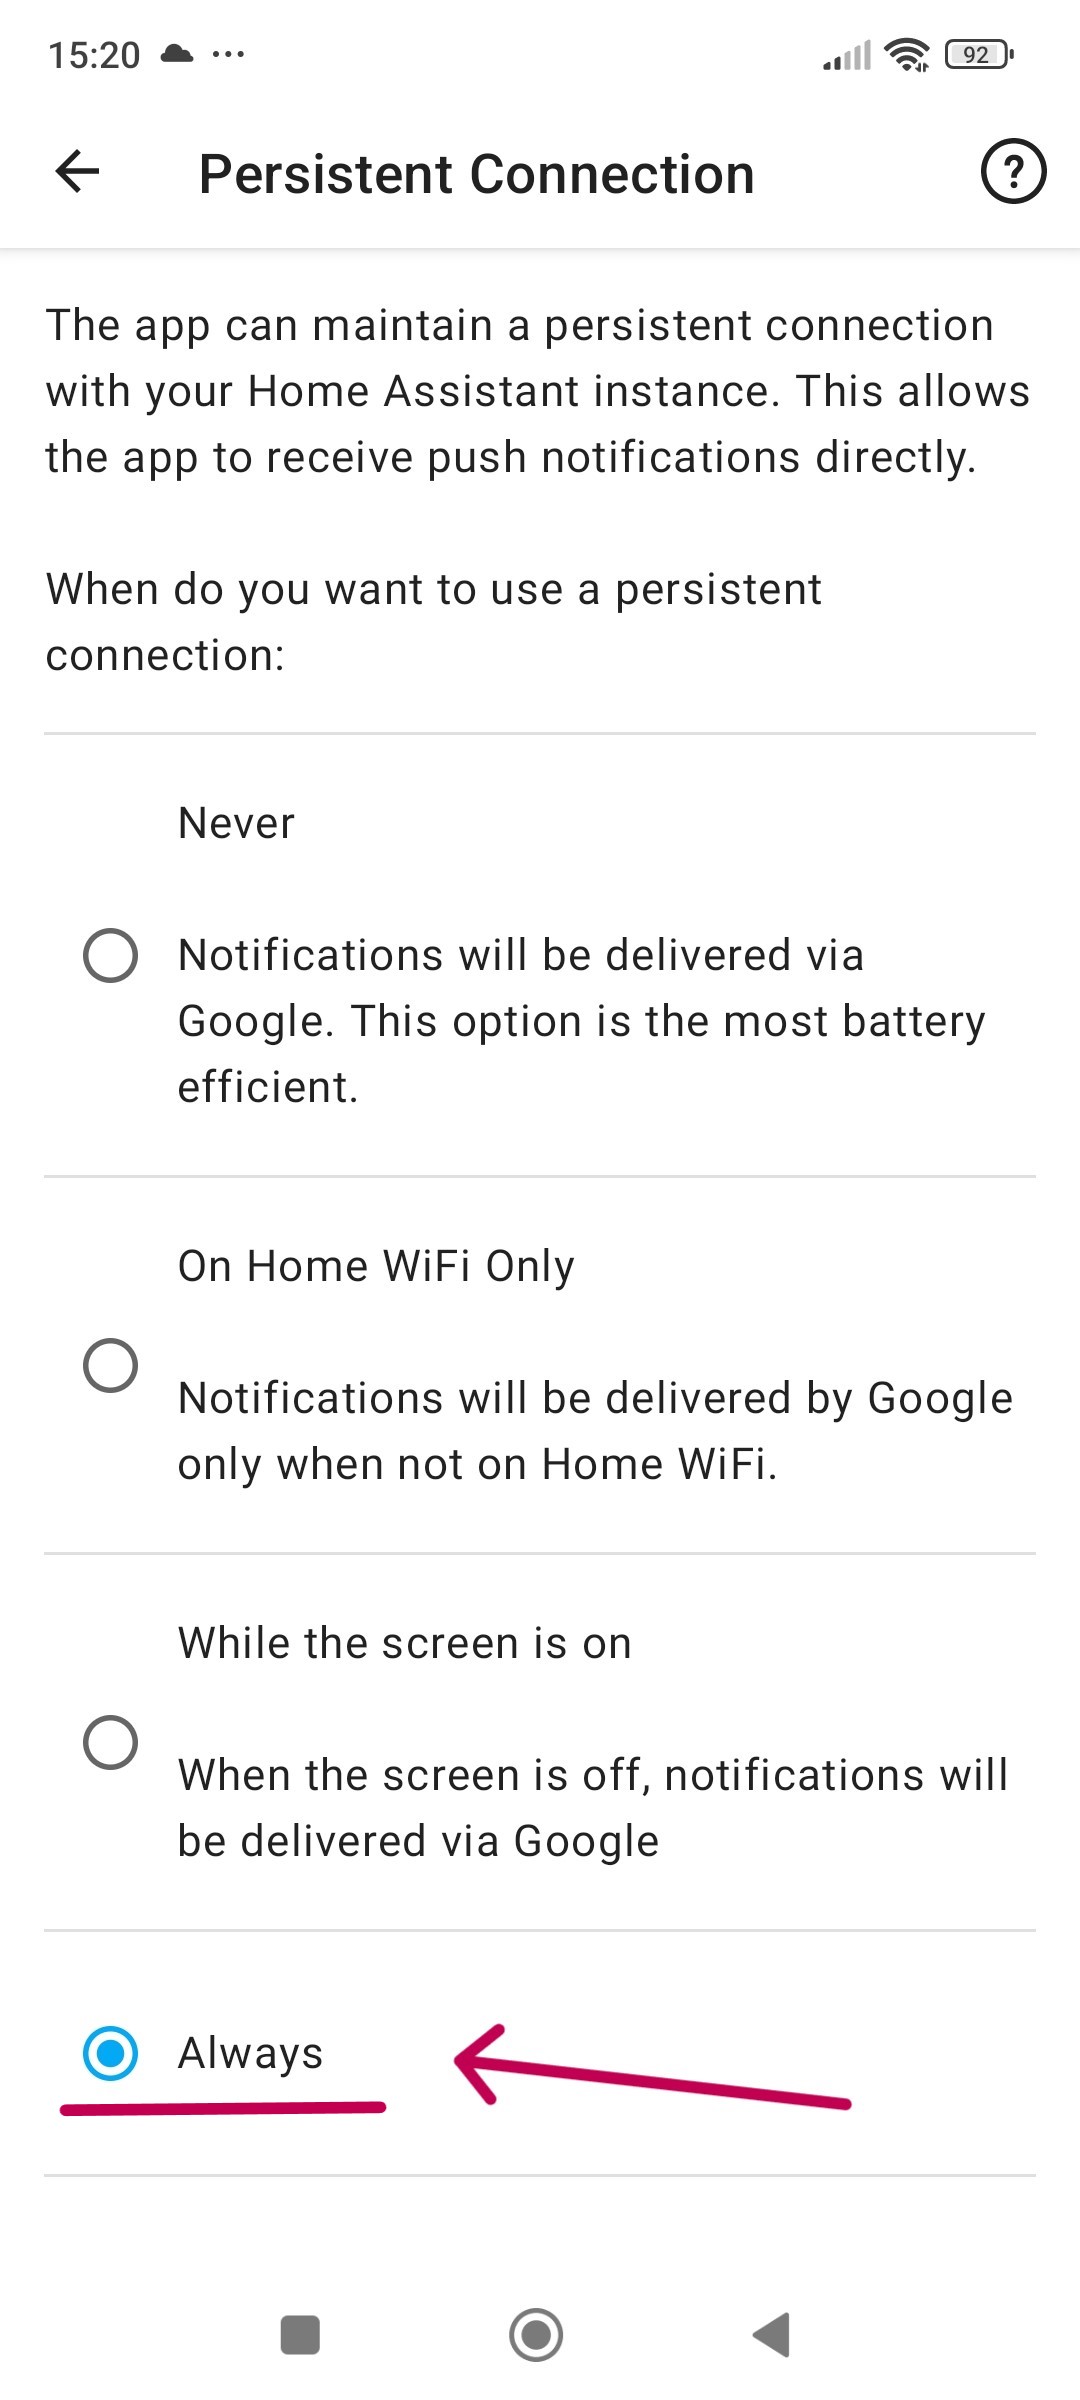
Enable WebSocket Communication
- Set the Persistent connection to Always.
-
Verify the Connection
- Navigate back to your Home Assistant dashboard and trigger the “Find My Phone” notification again.
- Confirm that the notification is received promptly, as intended.
Conclusion
Having the “Find My Phone” button on my tablet dashboard, right by the apartment door, has been a good solution. Whenever my phone goes missing, it’s just a quick tap away from making some noise and helping me track it down. Rarely a day goes by without me using it.
Thank you for reading this far, I hope it helps you!
