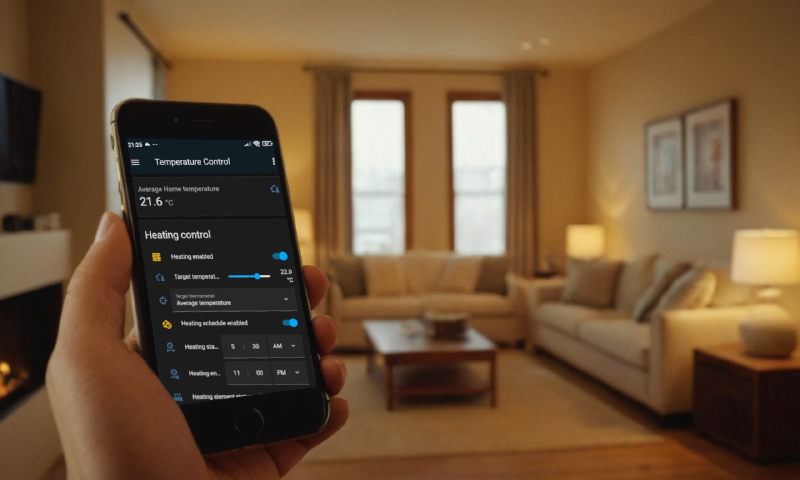
Introduction
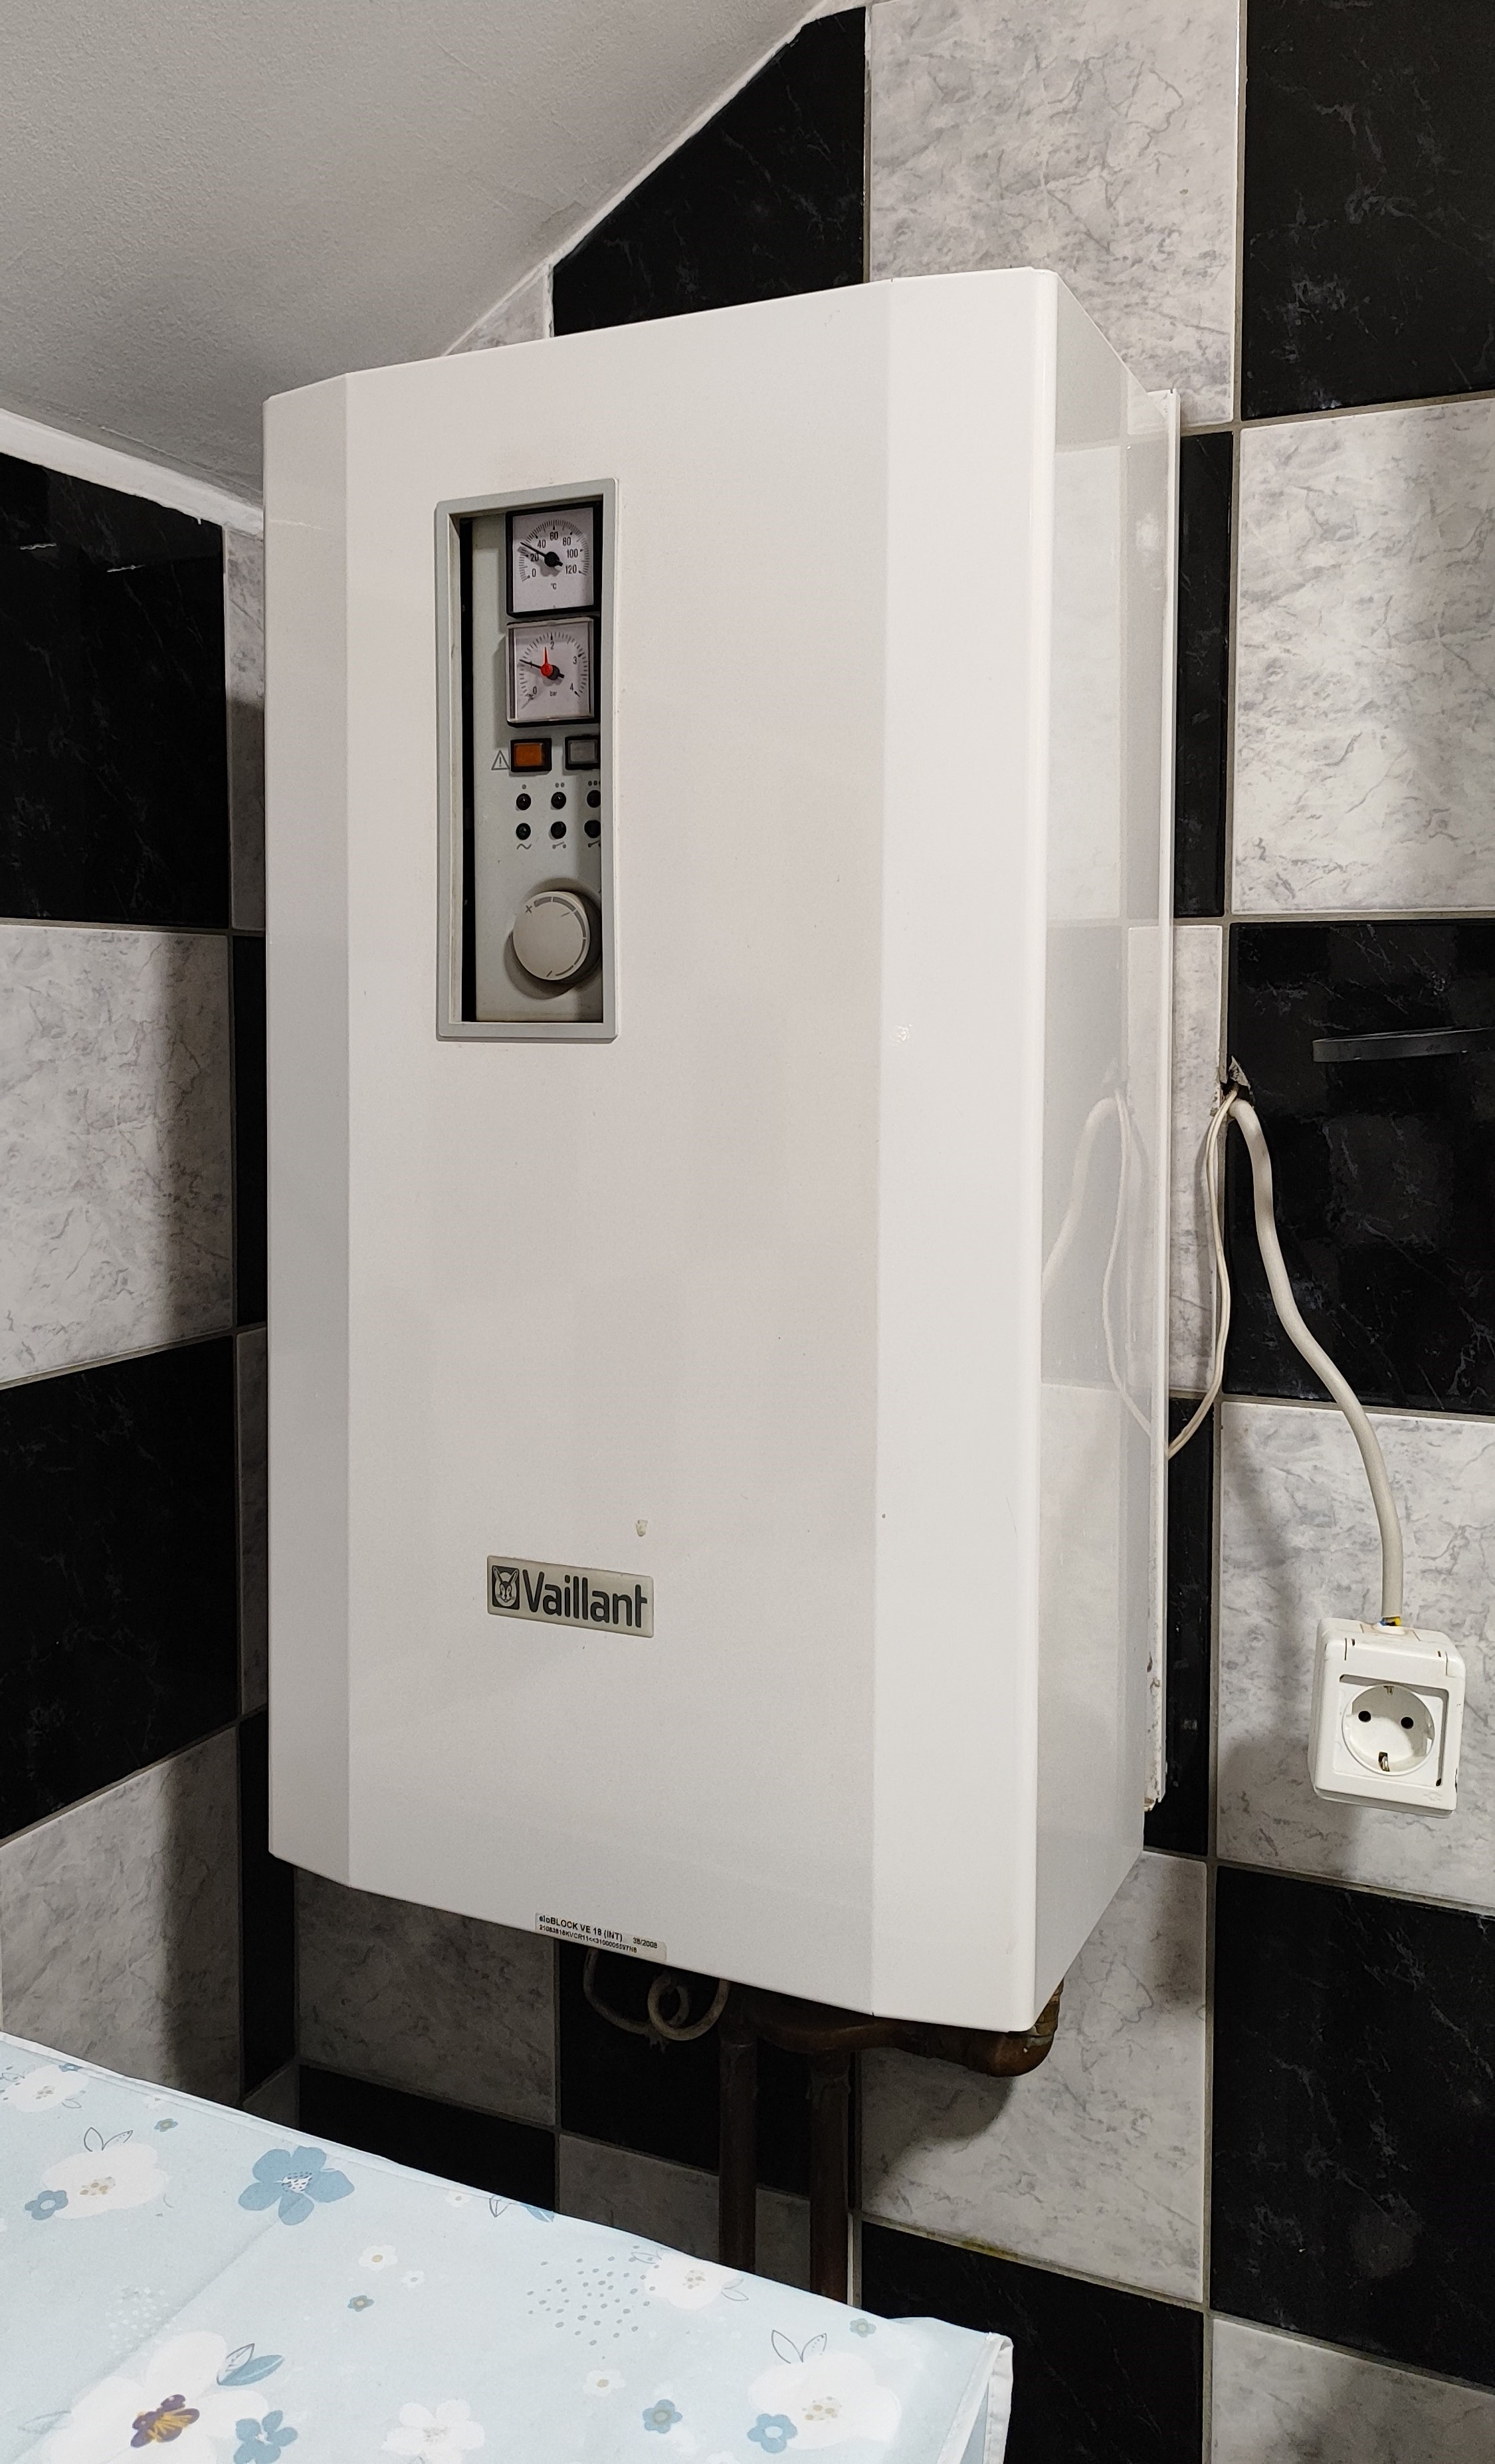
We recently purchased an apartment, and some work needed to be done to the central heating system. The heating system uses a Vaillant 18kw electric heating block situated in the bathroom and connected to radiators across the rooms.
This old girl has been heating the apartment reliably for 15 years. Other than a few bumps to the exterior and a bad thermostat, nothing was wrong with it. With winter fast approaching, it was time to give it a makeover and integrate it into my smart home.
Current thermostat and heating issues
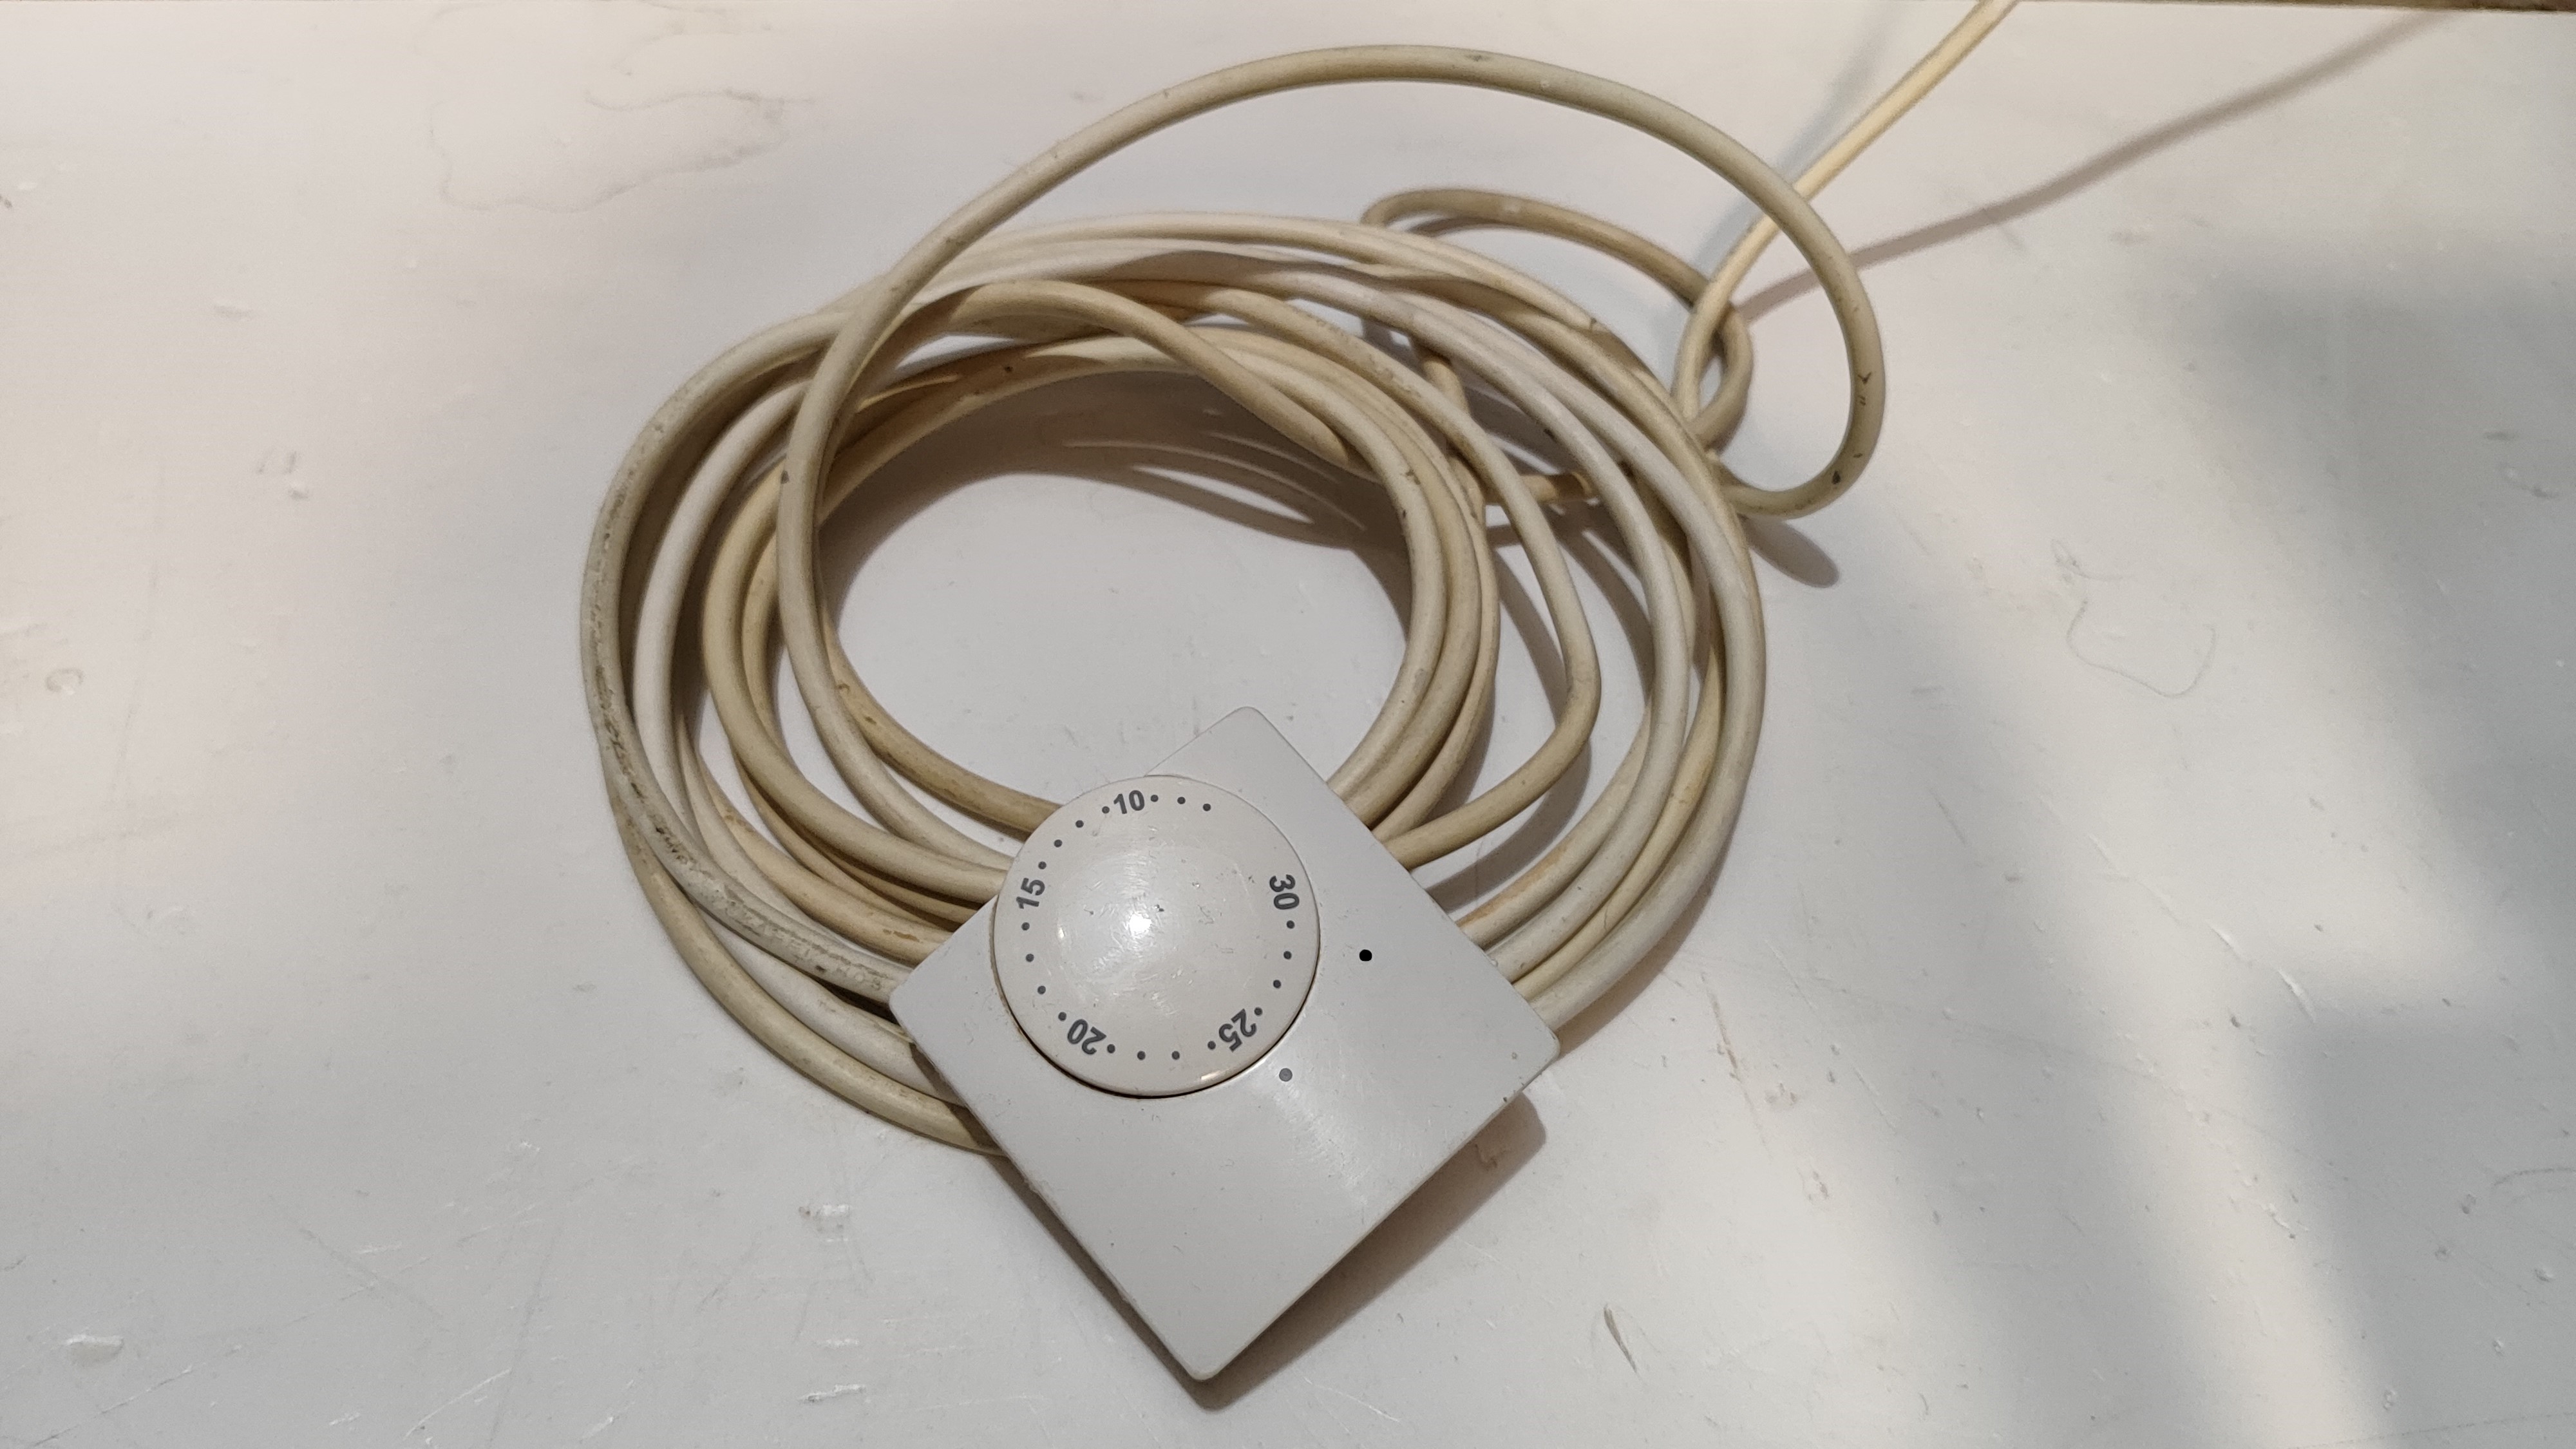
For temperature control, the system currently uses a single mechanical thermostat which is strung across the living room on a long cable. It looks horrible, as if the heating was added as an afterthought and the cabling was not integrated into the walls.
The other problem we have, is that the living room is generally warmer than the rest of the apartment by at least 1° C. The living room heats up quicker than the rest of the apartment and when the thermostat turns the heating OFF, the bedrooms do not heat up sufficiently and stay colder than we would like.
To solve both issues I was on a hunt for a commercial thermostat with the following features:
- Thermostat with WIFI, which we could mount out of sight to get rid of the ugly cable.
- The thermostat would have to have temperature sensors in individual rooms to wirelessly relay back temperatures across the apartment.
- The thermostat is to trigger the heating ON and OFF based on the average apartment temperature.
- It has to have an existing Home Assistant integration so that everything can be controlled from my phone or tablet dashboard.
It did not take me long to find the Ecobee SmartThermostat which fits the requirement. It is a good product, but it comes with a steep price point of $219.99. The base package only includes a single remote temperature sensor, with and additional pack of two temperature sensors costing $95.
We would pay over $300 to cover the requirements, provided that it can be interfaced with the old heater in the first place. This was over my budget, so I looked into alternatives.
Choosing the DIY route
The current thermostat is basically a mechanical switch, and this got me thinking if I could simply replace it with a smart switch of some sort and write Home Assistant automatons to control the heating flow. This way I could fully customize the system to my needs.
After searching around for good smart switches and wireless thermometers I have decided to use the following two key pieces of hardware:
XIAOMI Mijia Bluetooth Thermometer 2
- They look good and modern with a small form factor.
- Long lasting battery (up to a year, and it is replaceable)
- They provide temperature and humidity information via Bluetooth.
- Comes with an adhesive pad so it can be easily placed ona a wall.
- They cost about $4 on AliExpress.
- These things are simply brilliant. I bought three right away, one for the living room and the other two for the bedrooms.
Shelly 1 Mini Gen 3
- This is a smart relay switch which replaces the old bimetal thermostat.
- It connects to your network via WIFI.
- It can also function as a Bluetooth gateway, allowing our Xiaomi Thermometers to connect to Home Assistant even if our Home Assistant server has no Bluetooth capabilities.
- At the time of writing, this relay costs about $14.
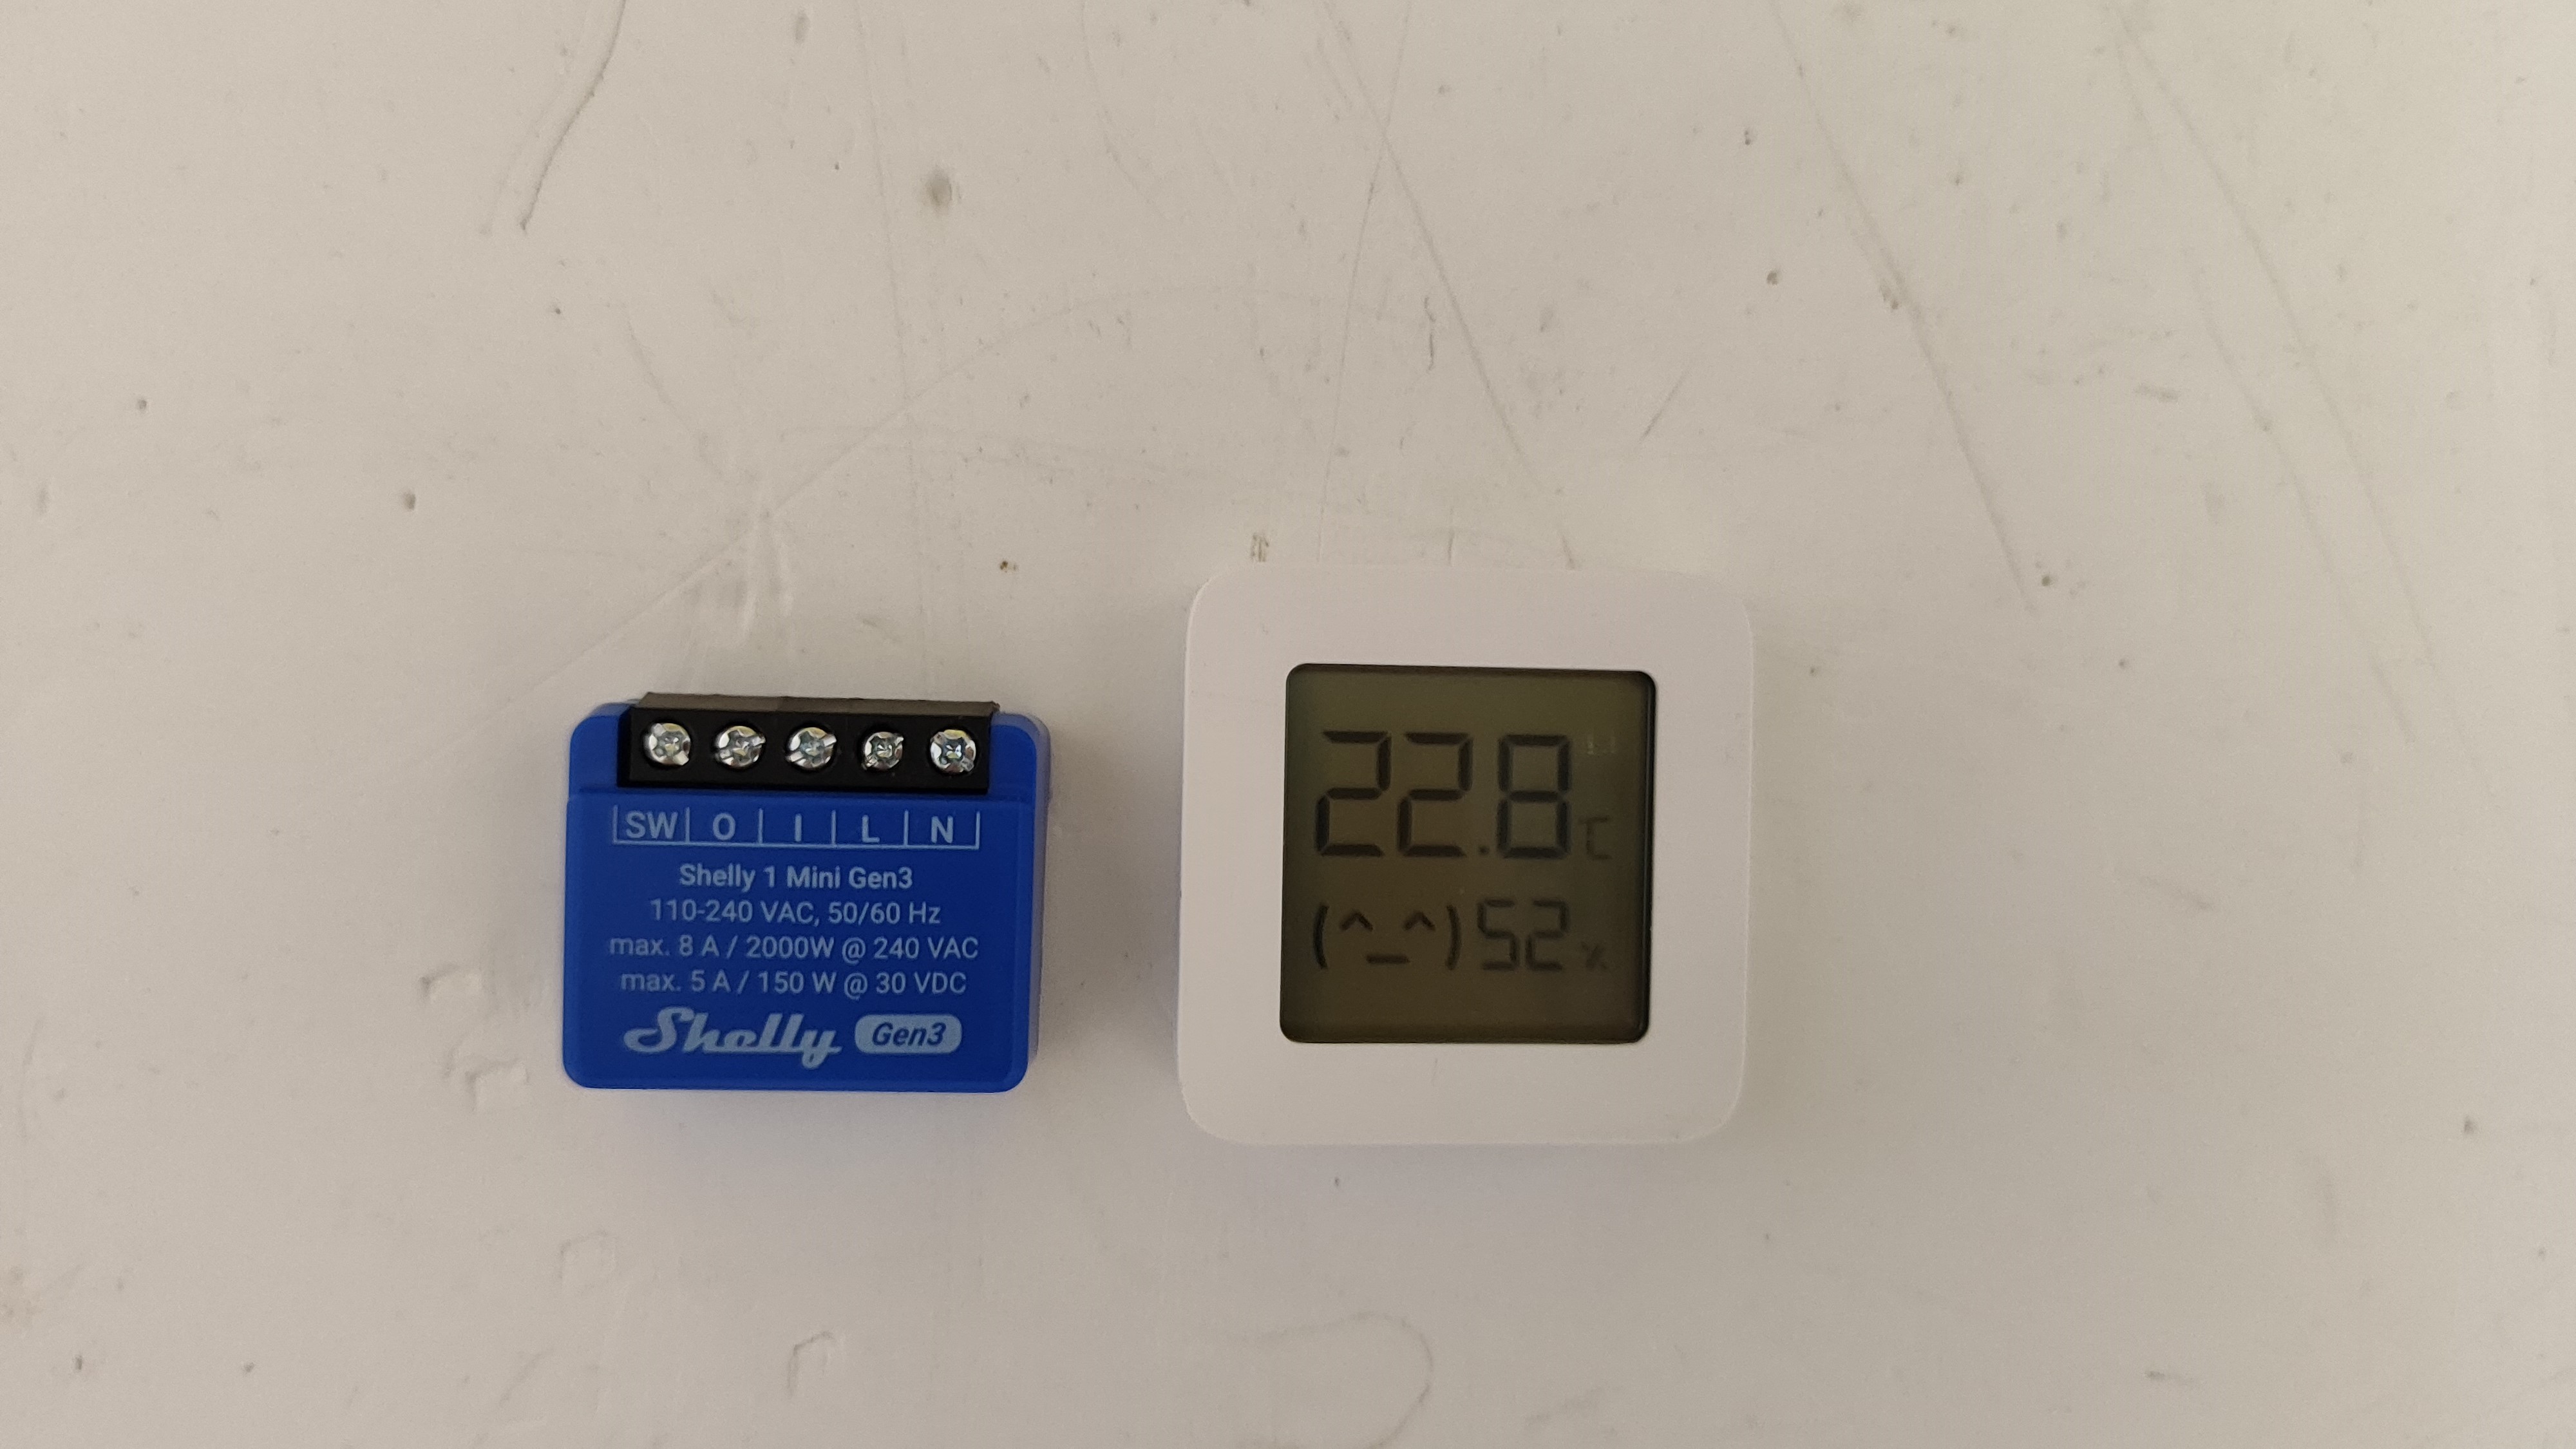
The Bluetooth gateway comes in handy because my current Home Assistant setup has no bluetooth capabilities. I am running HAOS on a Dell Wyse ZX0 7010 Thin Client. The thin client can be upgraded to 8GB of DDR3 Ram and an SSD fits just fine. You can even add multiple SSDs via an existing SATA port and Mini PCIe slot.
It is not the best hardware out there, but for simple setups it works fine. I bought it for around $45 (including a power adapter, 8GB RAM and 120GB SSD)
Setting Up the Hardware
The main idea was to insert the Shelly switch in series with the existing thermostat. I decided to keep the old thermostat as it allows me to have a backup safety thermostat in case I have a fault with Shelly or Home Assistant in general. The old thermostat had its cabling shortened and mounted out of sight. The temperature of the old thermostat was set to 25° C and this marks the absolute maximum heating temperature.
One major concern I had to address was measuring the current flowing through the old thermostat. The Shelly can handle 8A at 230VAC and if the current flowing through the old thermostat at full heating power is more than 8A then Shelly 1 Mini will not fit your needs.
In my case, there were only a few mA flowing thorough the thermostat and Shelly 1 Mini is more than capable of handling this.
Please measure the current which passes through the existing thermostat before attempting this build. A fire hazard is the last thing anyone needs in their home.
New hardware design
The following hardware design was used to tie the Shelly in series with the existing thermostat:
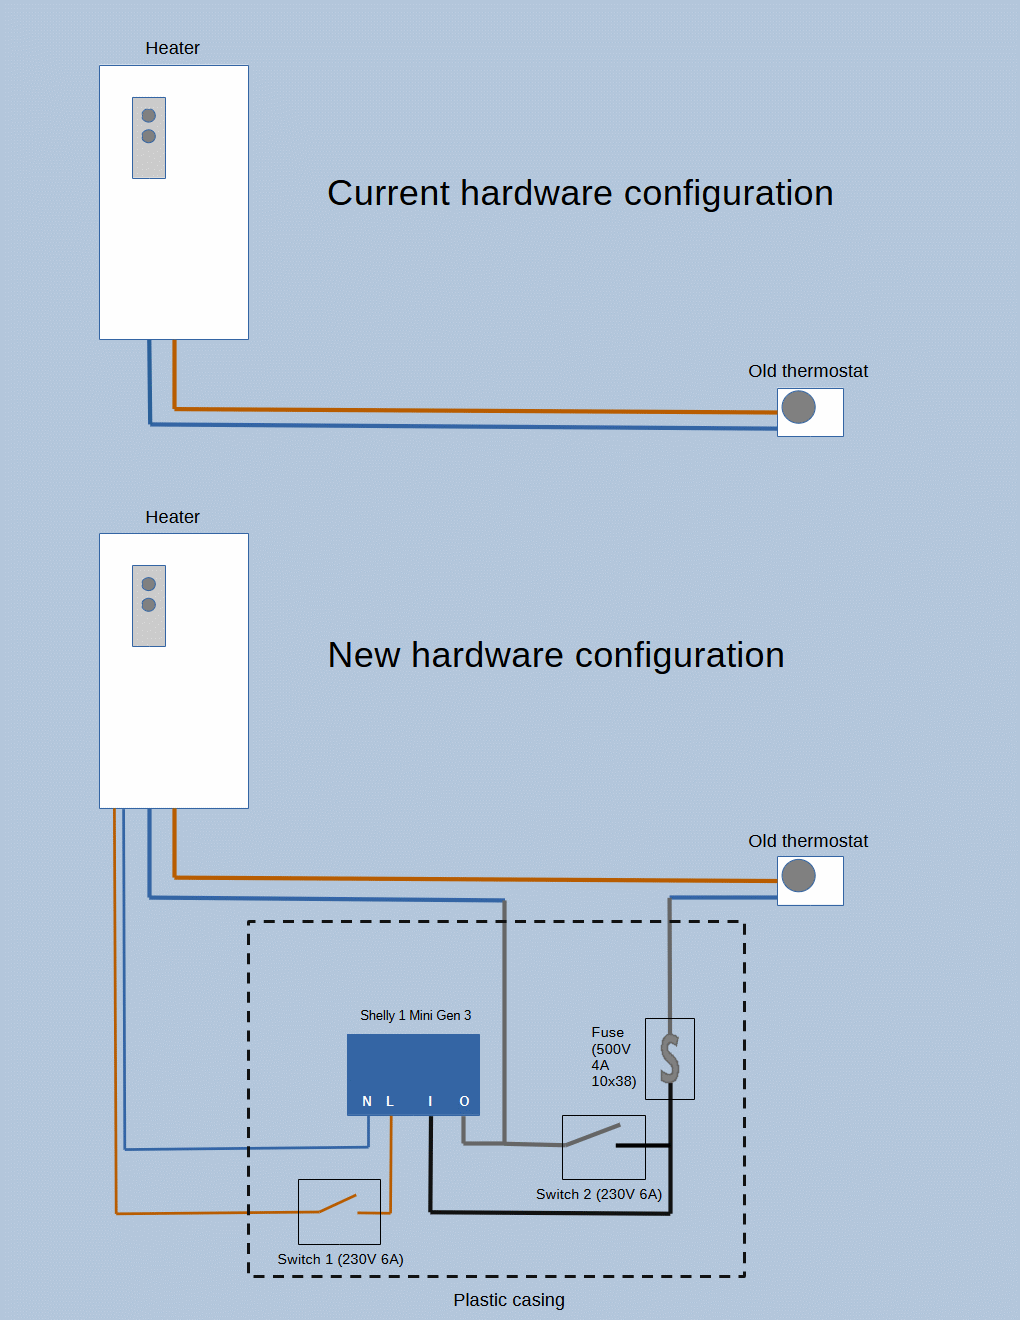
Detailed hardware list used in the design:
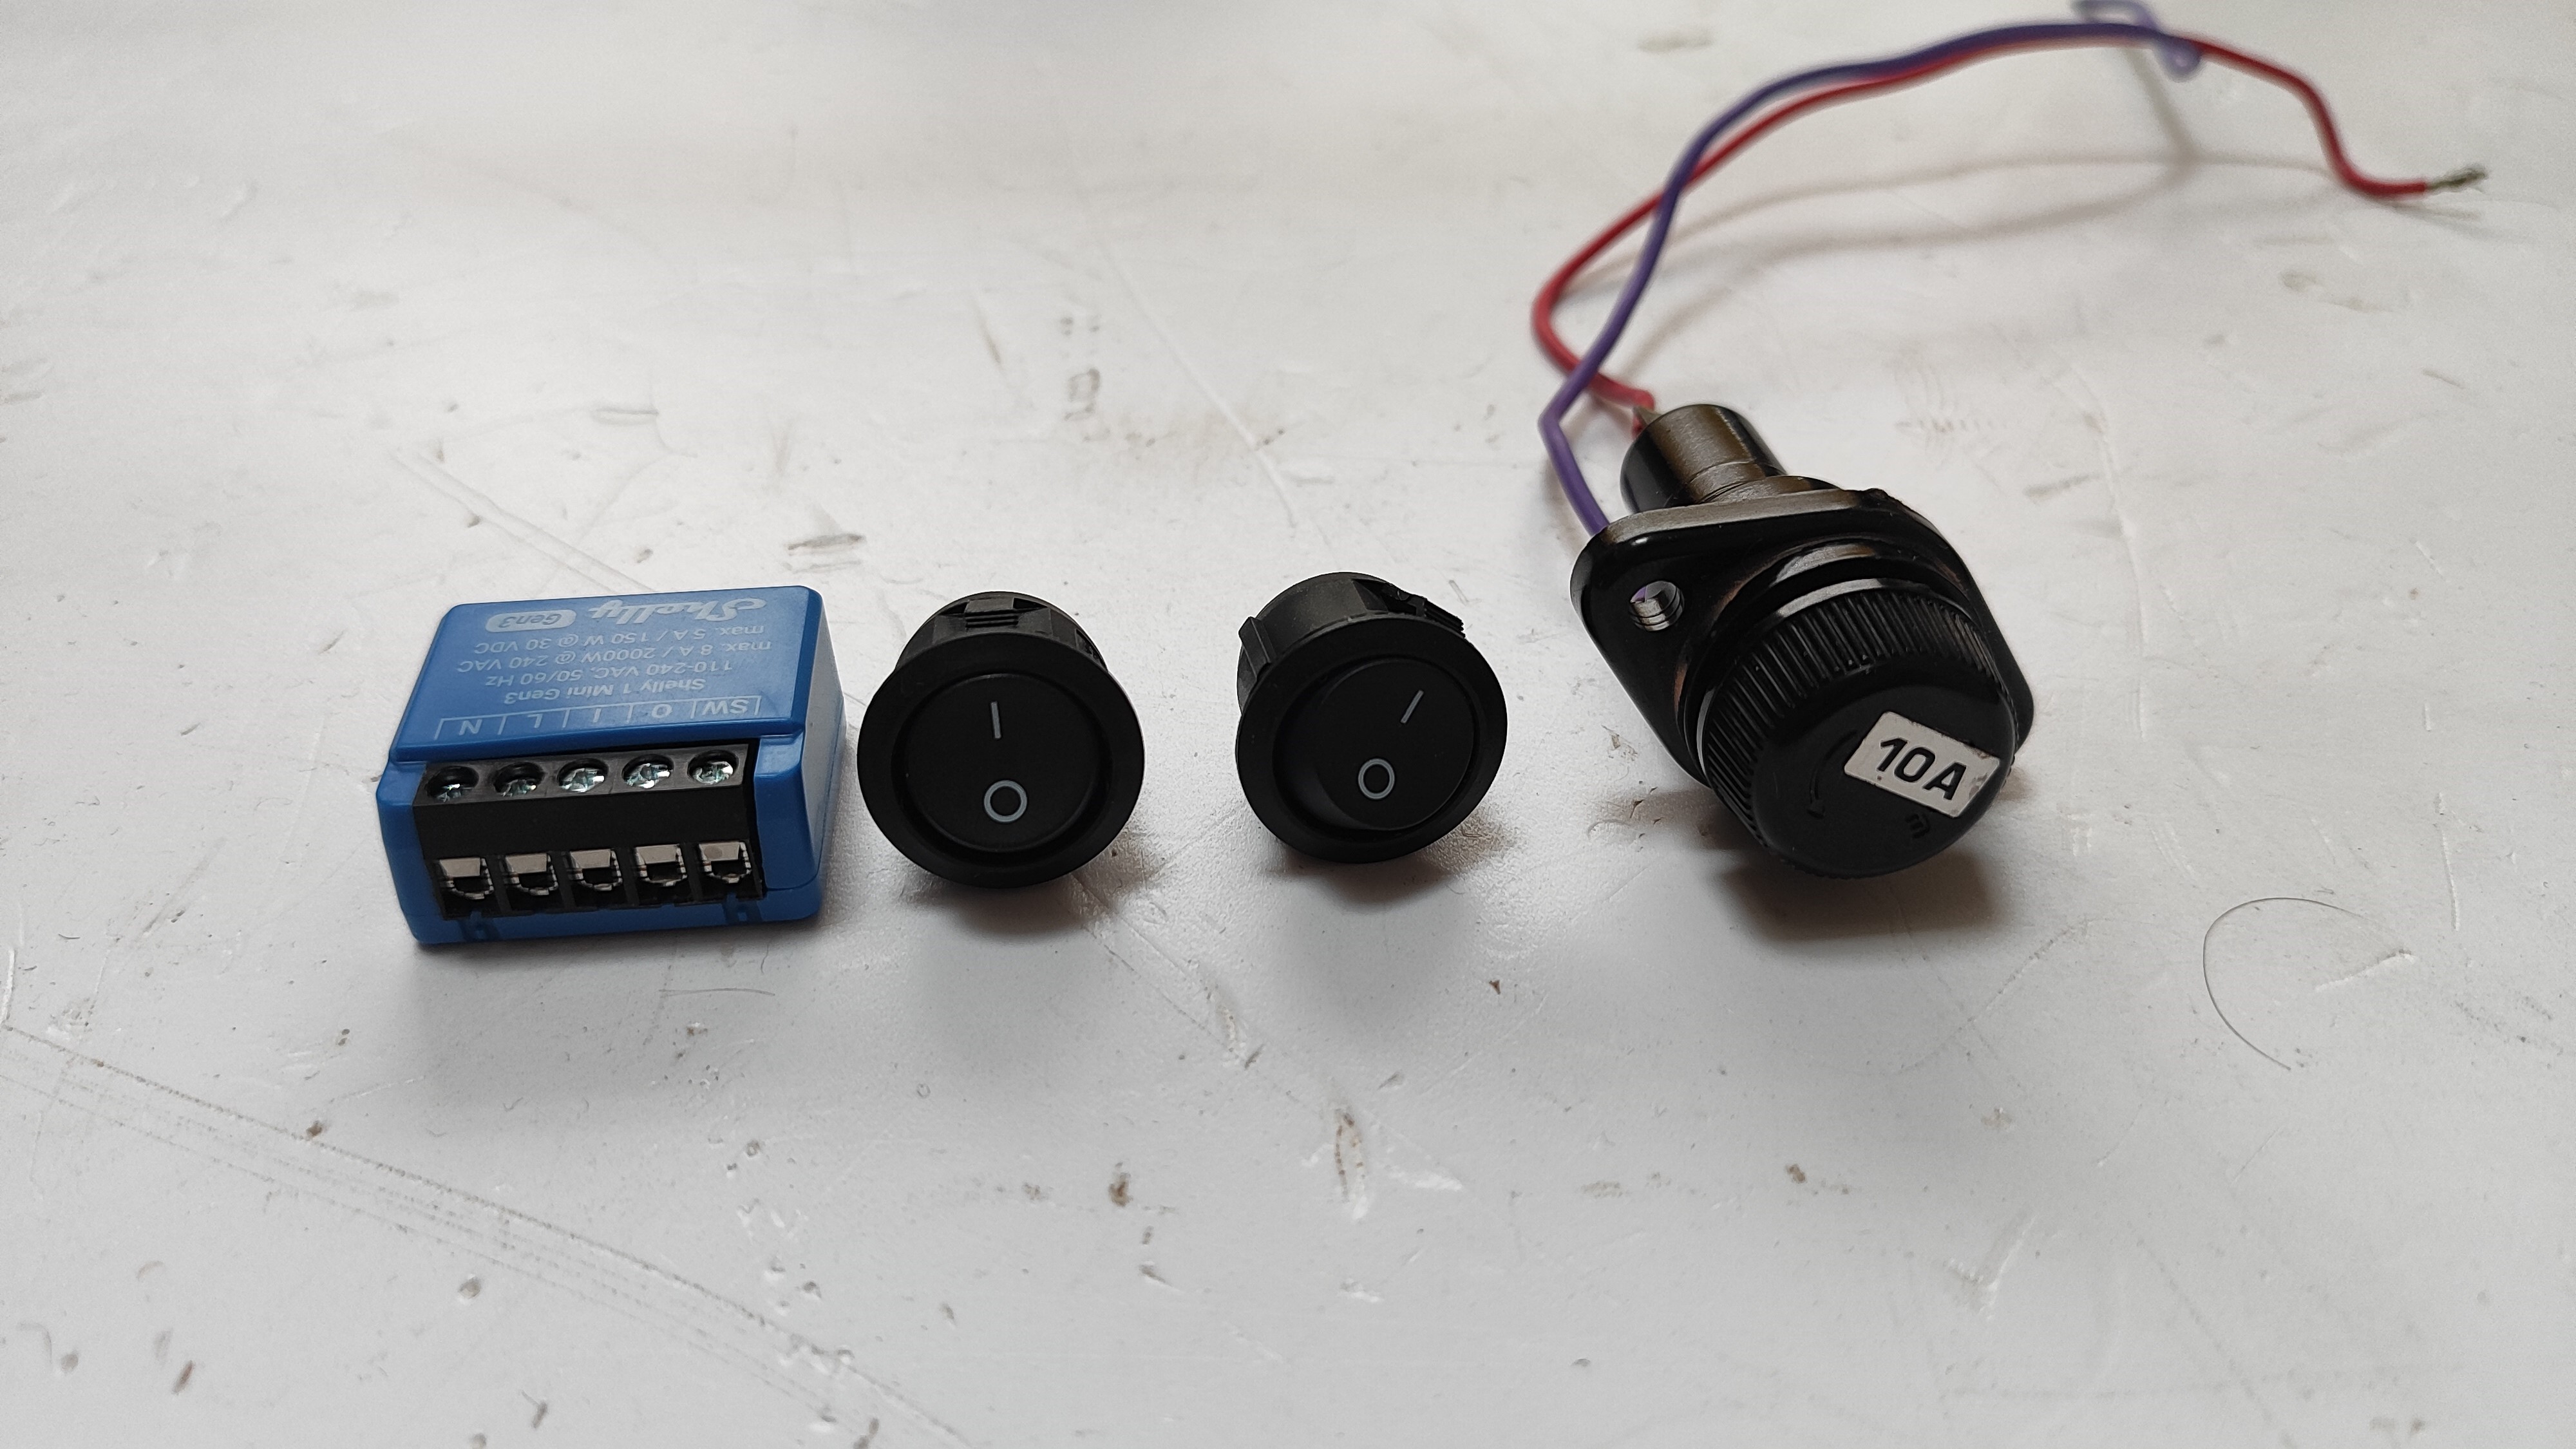
- Switch 1 (230V 6A) - is used to turn ON and OFF to the thermostat, It will normally be in the ON position during heating season. To power the Shelly I used the spare live terminals from the heater.
- Switch 2 (230V 6A) - is used to override the new thermostat in case of Shelly/Home Assistant failure. It will normally be in the OFF position. Setting this switch to ON will short circuit the Shelly outputs and default the system to the old thermostat.
- Fuse (500V 4A 10x38) - is there to protect the Shelly and Switch 2 from unexpected current spikes. Since I measured very little current flowing thorough the old thermostat I have added a 4A fuse I had lying around. Since the Shelly is rated at 8A, and the Switch 2 is rated at 6A, this will be more than enough to keep them safe.
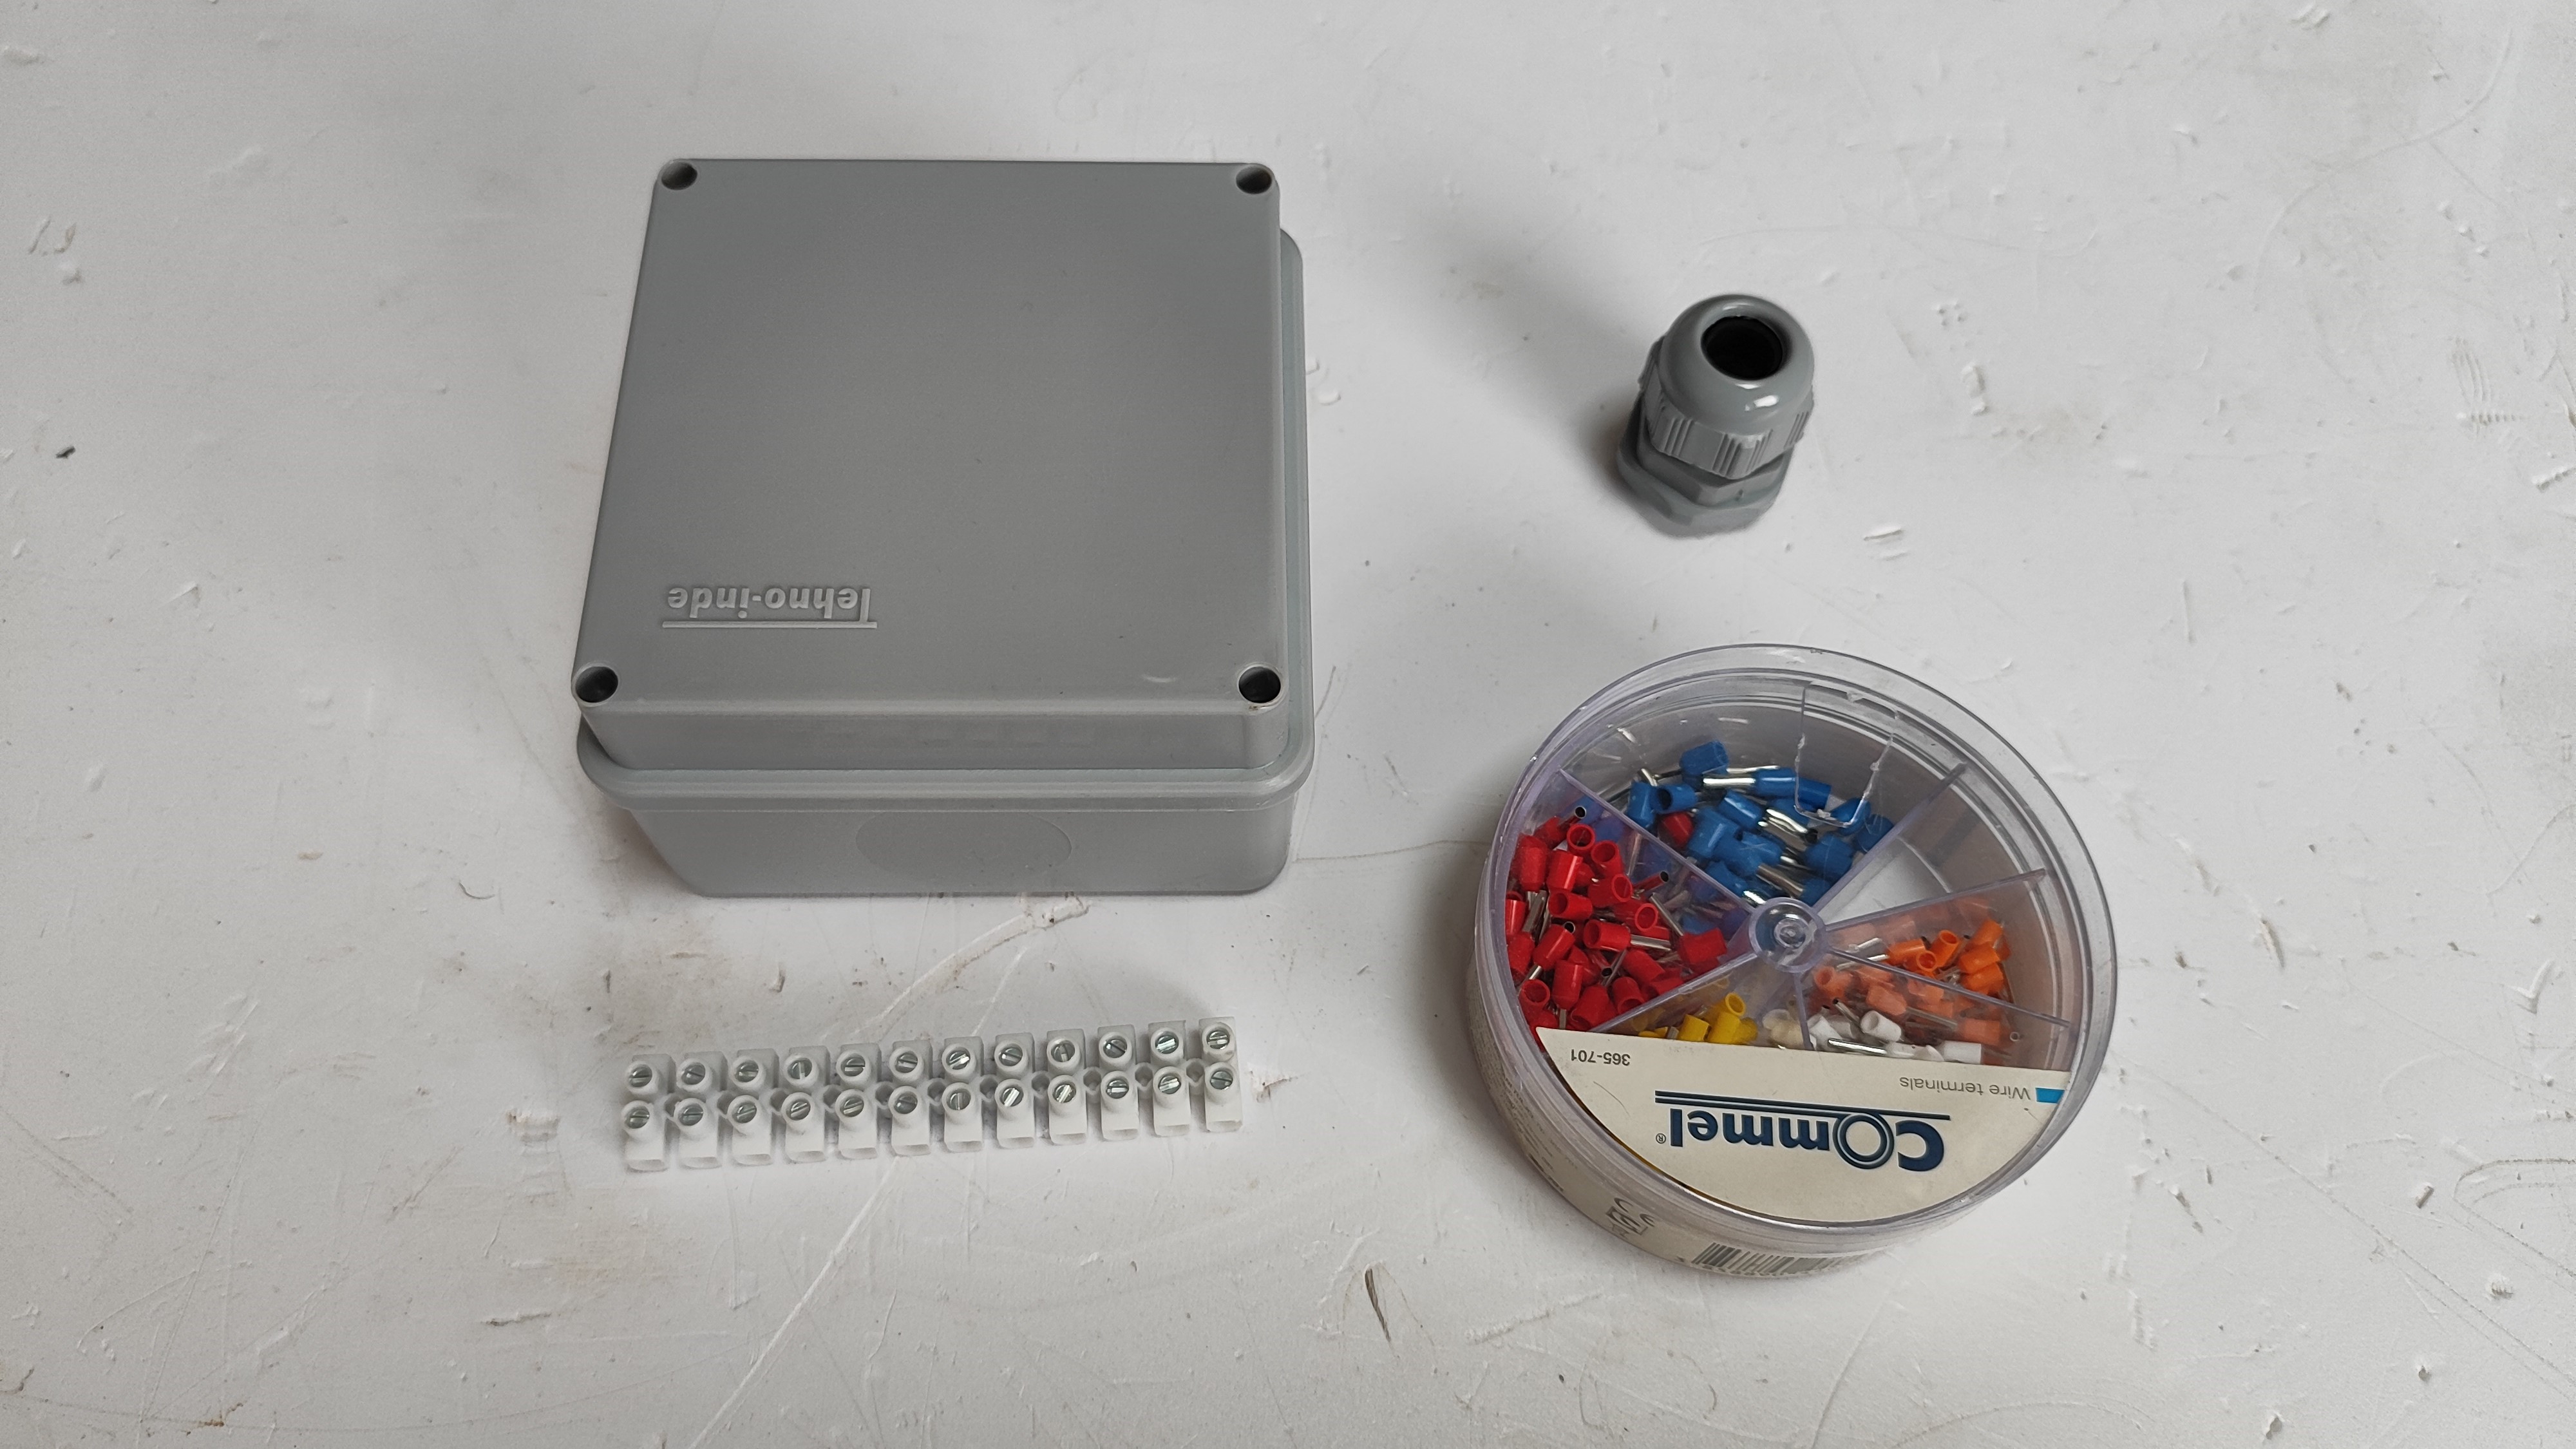
- Plastic enclosure - to fit everything together.
- Cabling - I used a 5 wire 1.5mm2 three phase cable. Two lines were used (brown and blue) to power the Shelly and the other two (black and grey) to connect the switch in series with the existing thermostat.
- Miscellaneous - ferrules, heat shrink, hot glue, mounting screws etc.
Here are some photos taken during the build process:
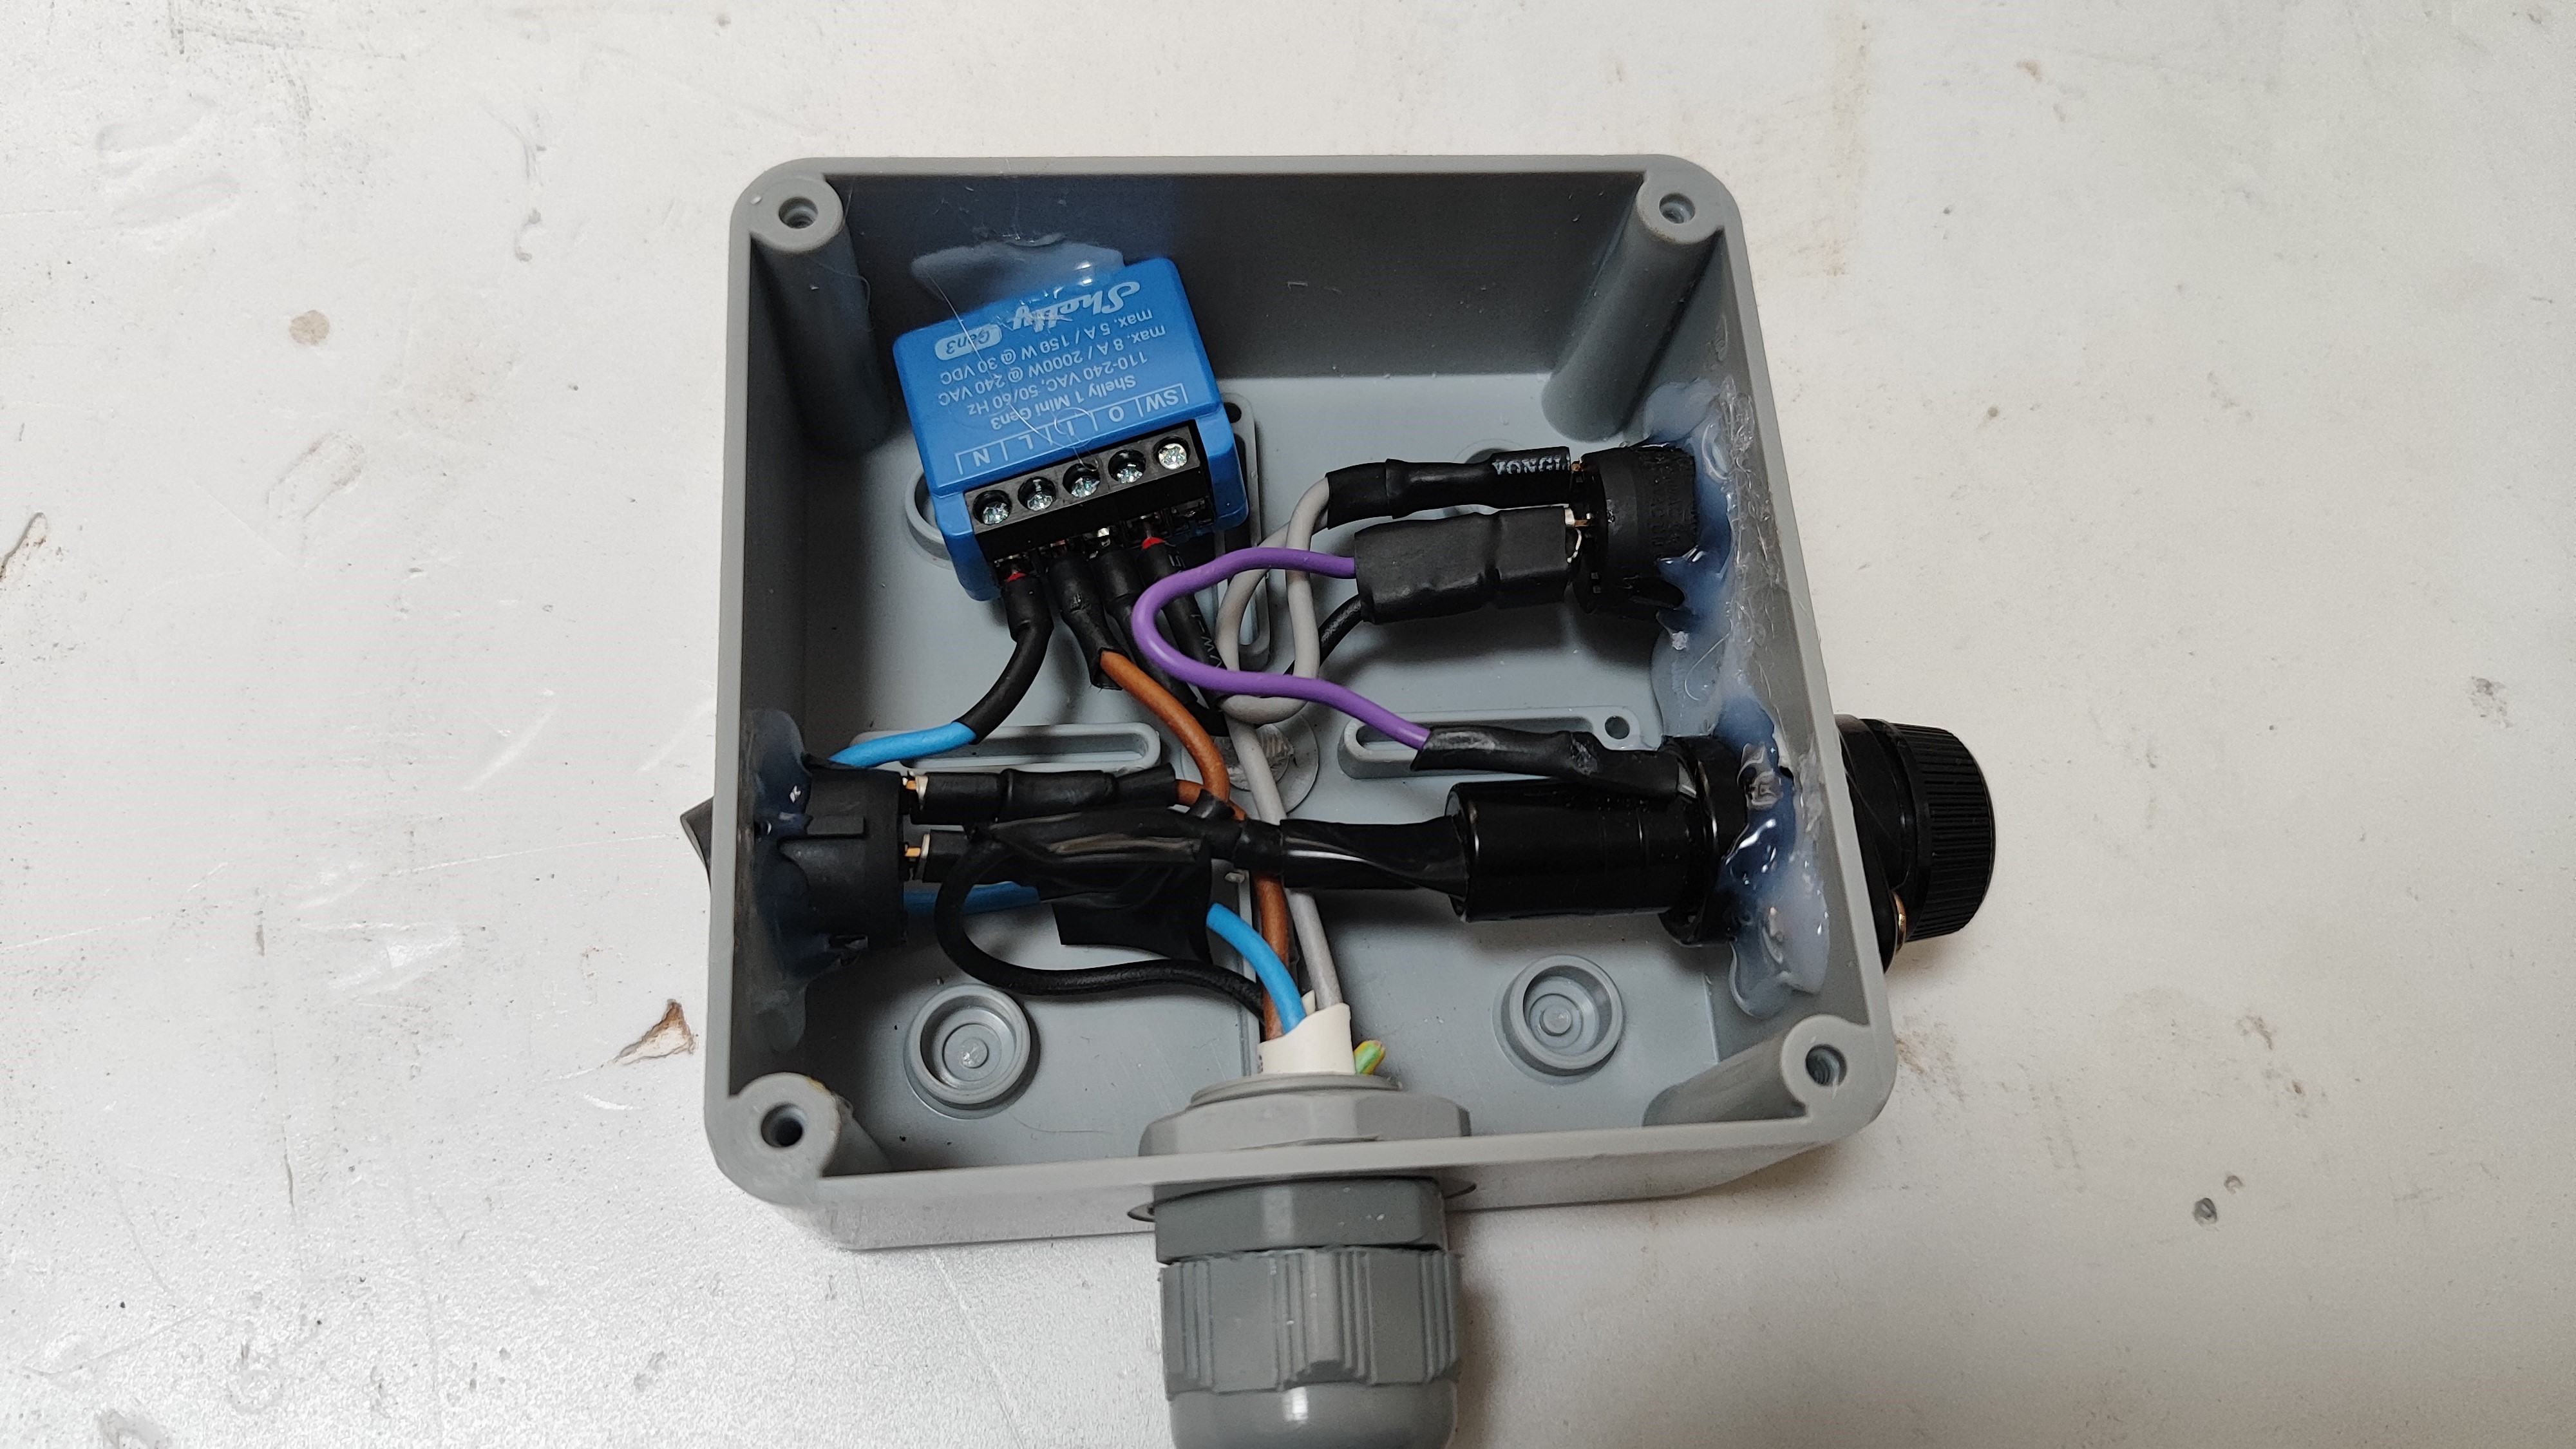
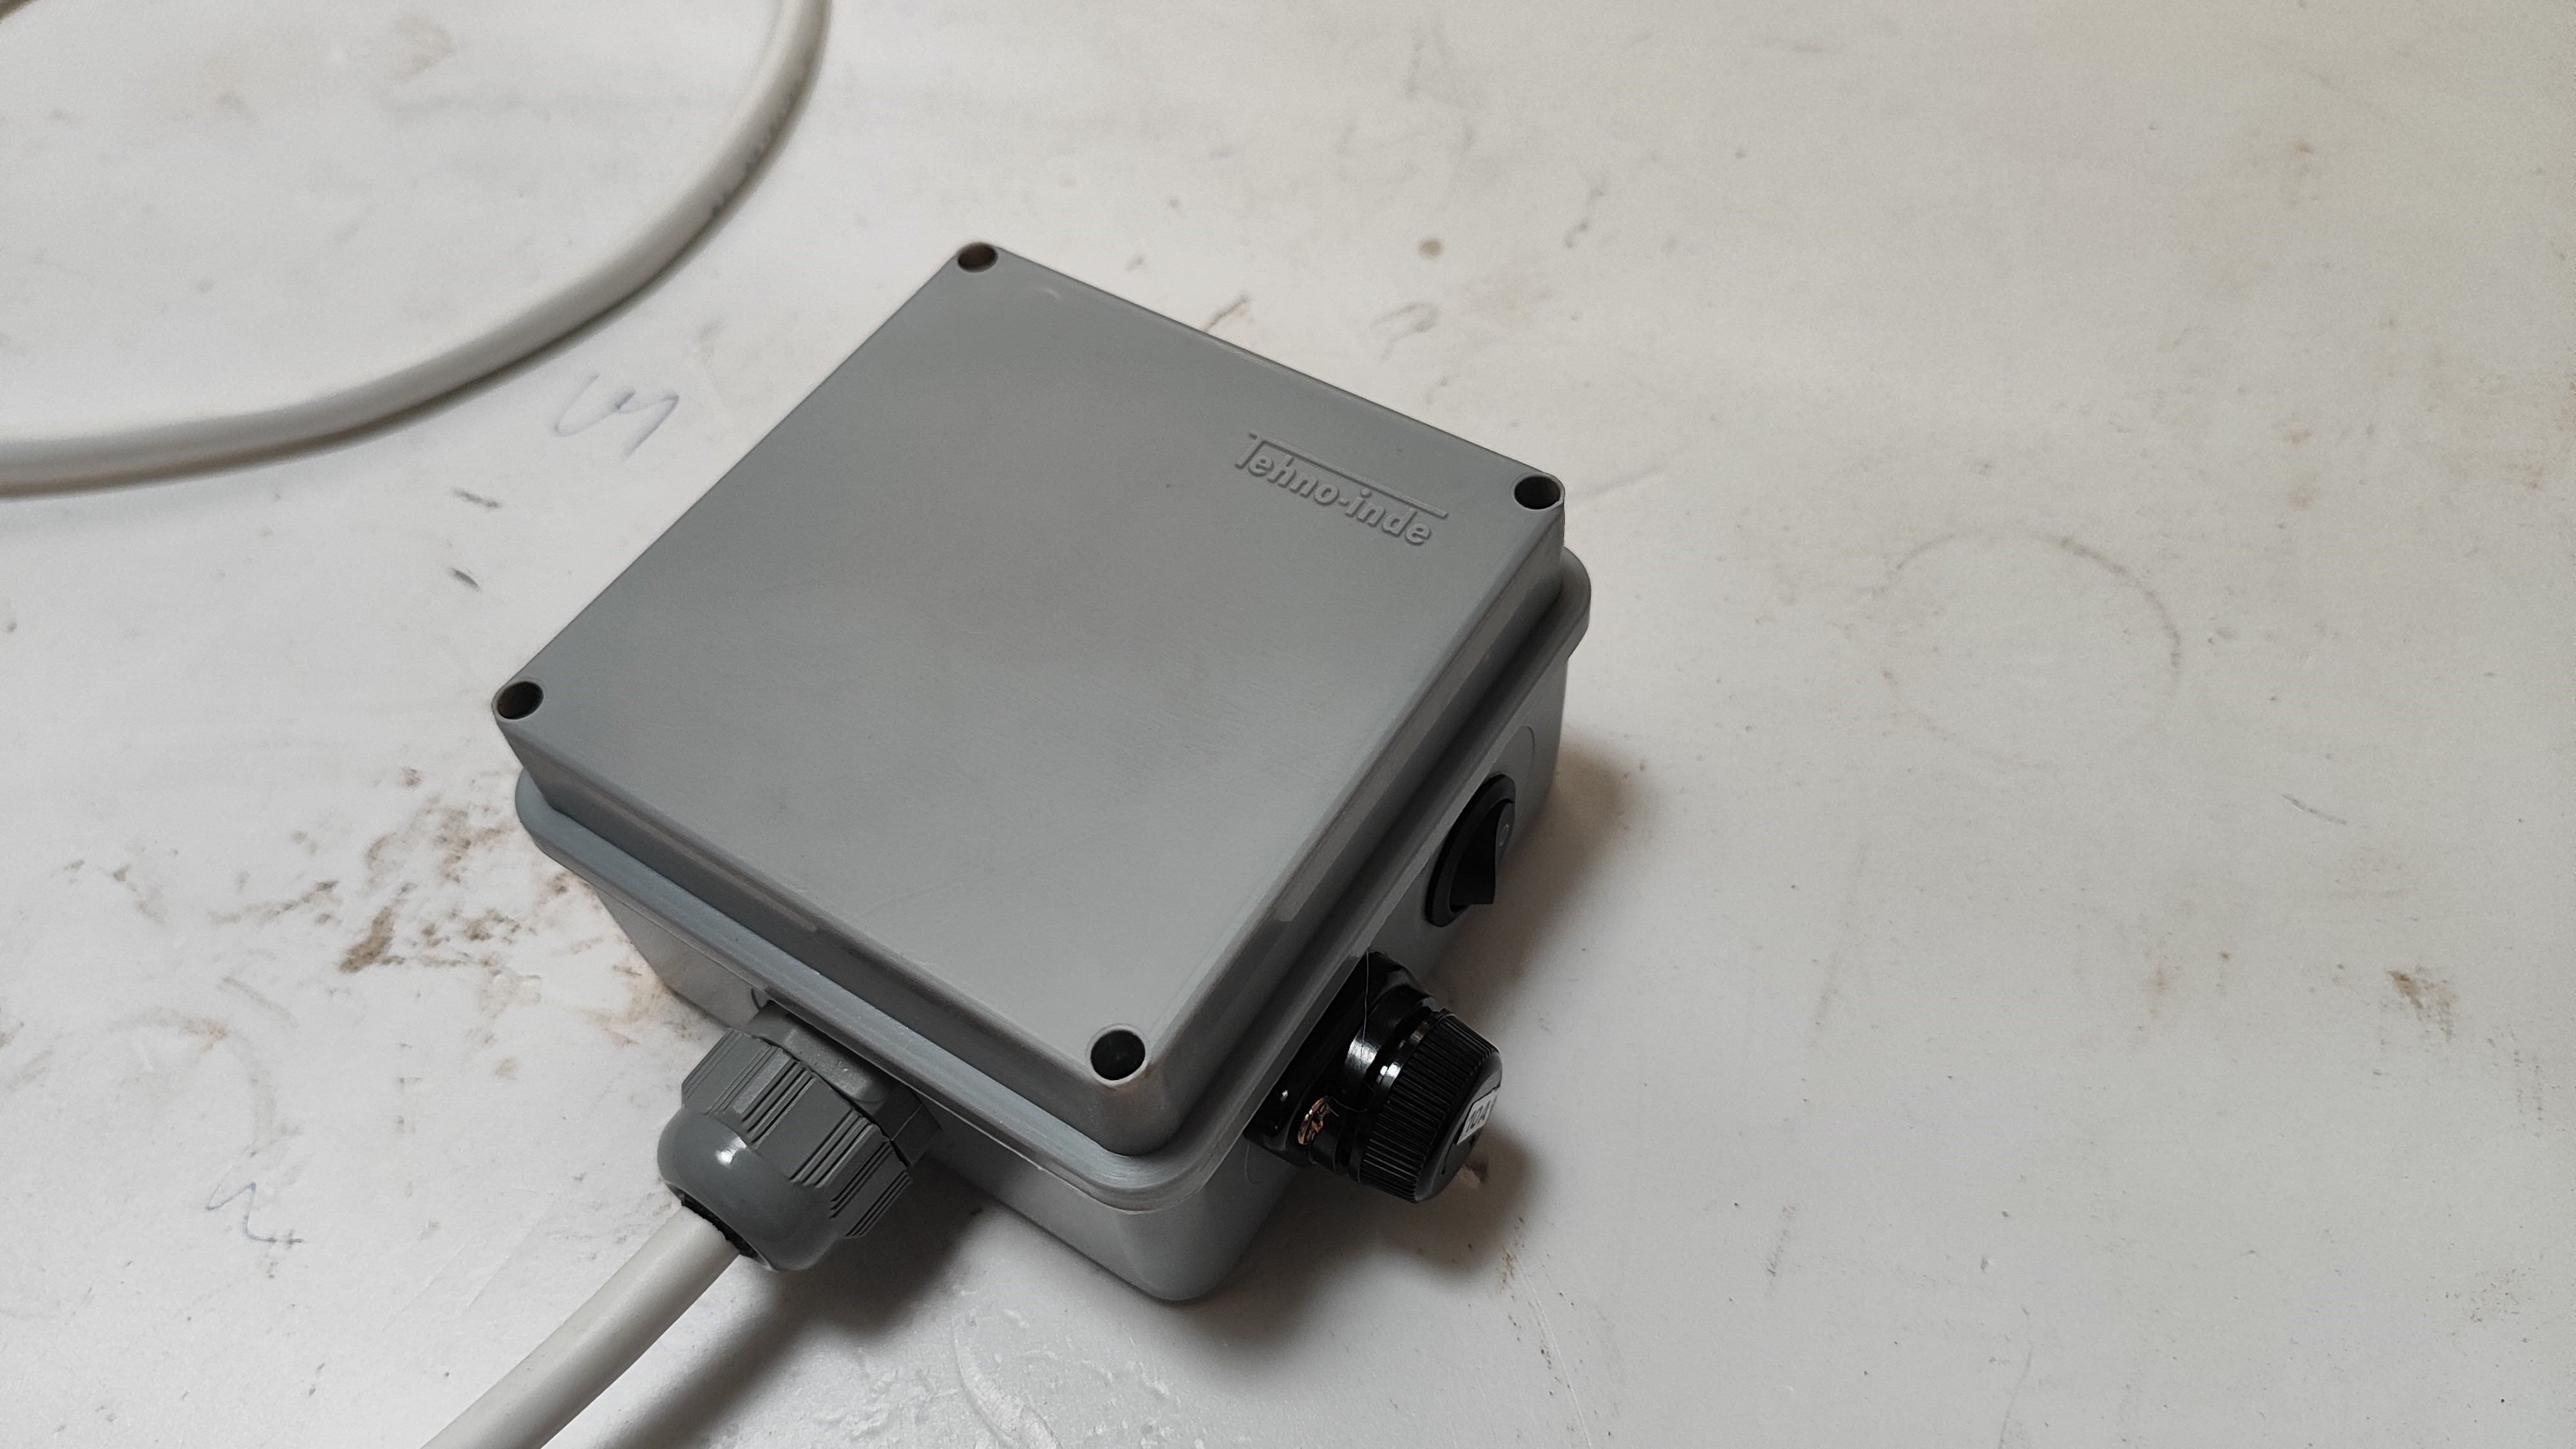
Once I had everything assembled and neatly secured next to the heater I was ready to power the Shelly for the first time and configure the Home Assistant software.
Setting up the Shelly Switch
To connect the Shelly switch to Home Assistant we first need to power it up, and use the Shelly Android or IOS app to connect the smart switch to your WIFI network. Once this is done, your Shelly should be auto detected in Home Assistant. If this is not the case try adding the Shelly integration manually.
Your Home Assistant has to have BT capabilities in order to interface with the thermometers. If this is not the case, fear not as Shelly has you covered.
Shelly has an option to act as a Bluetooth Gateway. Head over to the settings sections and enable Bluetooth and Gateway options.
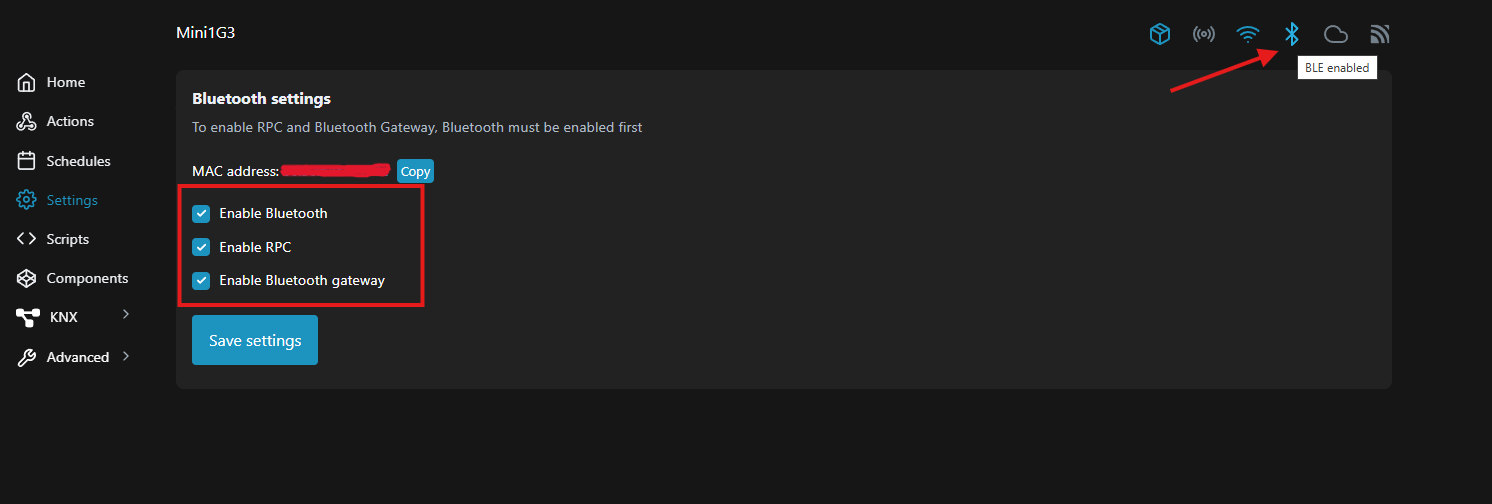
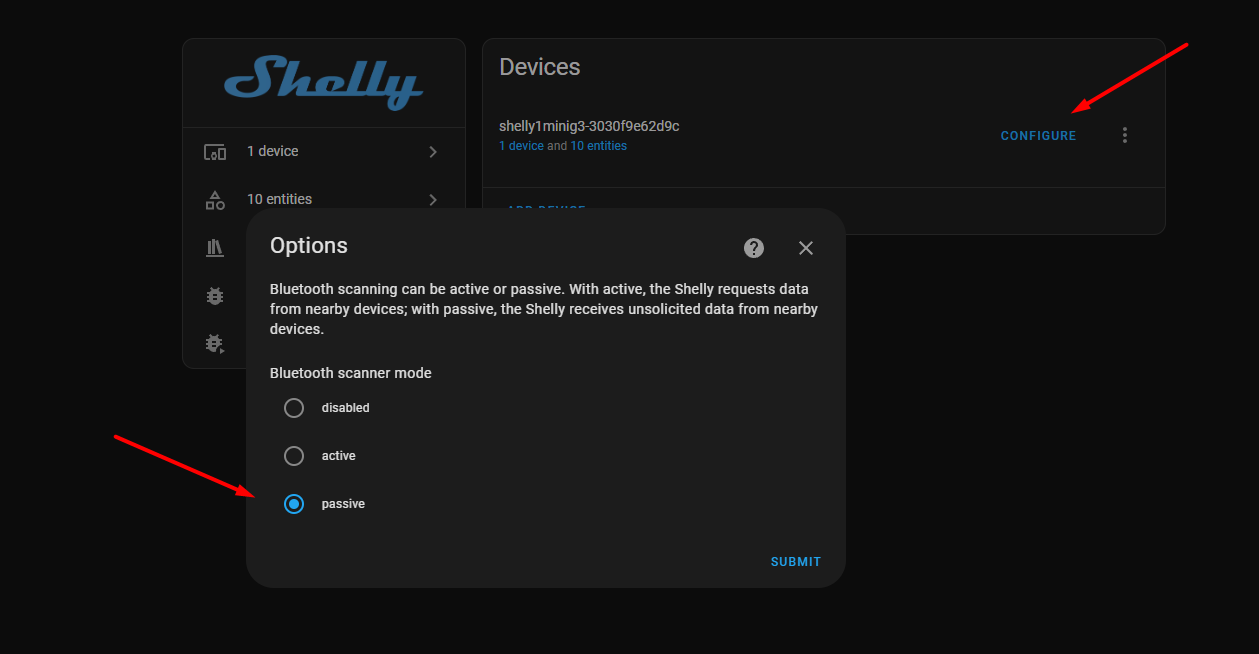
After enabling Bluetooth head over to Home Assistant, find the Shelly integration under Settings > Devices & services > Integrations and enable passive Bluetooth scanning to get data from the thermometers. Now the thermometers can connect to Home Assistant through Shelly.
Setting up the Xiaomi Thermometers
To connect the thermometers to Home Assistant we need to flash custom firmware on them. This sounds complicated but it is quite simple and is done via browser. Follow this great tutorial by KPeyanski to set up your thermometers.
The firmware flash is done via the website: https://pvvx.github.io/ATC_MiThermometer/TelinkMiFlasher.html.
The device which you are using to flash the Xiaomi thermometers has to have Bluetooth capabilities. For example I am using my laptop which has Bluetooth built in.
Since the tutorial is one year old, there are some differences in the actual site for the custom firmware. At the time of writing I selected the Custom Firmware: ATC_v47 and configured the Advertising type to be BTHome v2. After this the thermometers were auto detected in Home Assistant, and were ready to be connected.
Setting up the Home Assistant UI
The goals of the project were the following:
- I have to be able to turn the heating system ON and OFF through the Home Assistant UI.
- I have to be able to set the target heating temperature thorough the Home Assistant UI.
- The target heating temperature is to be compared to the average apartment temperature. This temperature is calculated as the average of the two thermometers.
- Once the apartment temperature reaches the target temperature, the system is to turn OFF the heating.
- Once the apartment temperature falls 1° C below the target temperature, the system is to turn the heating back ON.
- I also want the ability to choose which thermometer is the target thermometer. For example, if the bedroom temperature is way below average, I want to be able to change the target thermometer from the average apartment temperature, to the bedroom temperature.
- I also want to be able to set the active heating hours. For example I want the heating to turn ON at 6AM and turn OFF after 11PM.
To meet the project goals this is the dashboard I ended up making, all done through the UI with minimum custom YAML.
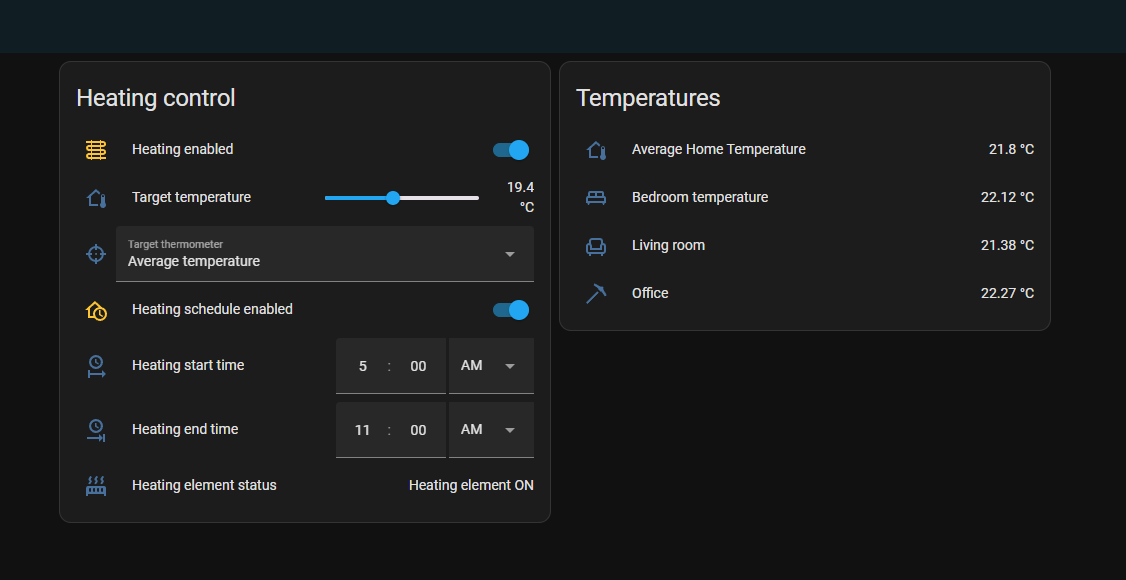
Each of this individual controls, can be made through the UI as Helpers. Each and every one has to be created before we group them all up in the UI.
Head over to Settings > Devices & services > Helpers and click on the Create Helper button. From here we will create all the new controls such as toggles, dropdowns etc.
Setting up the average temperature thermometer
We first need to create a virtual thermometer based on the other thermometers. In my case this will be the average temperature between the living room and bedroom.
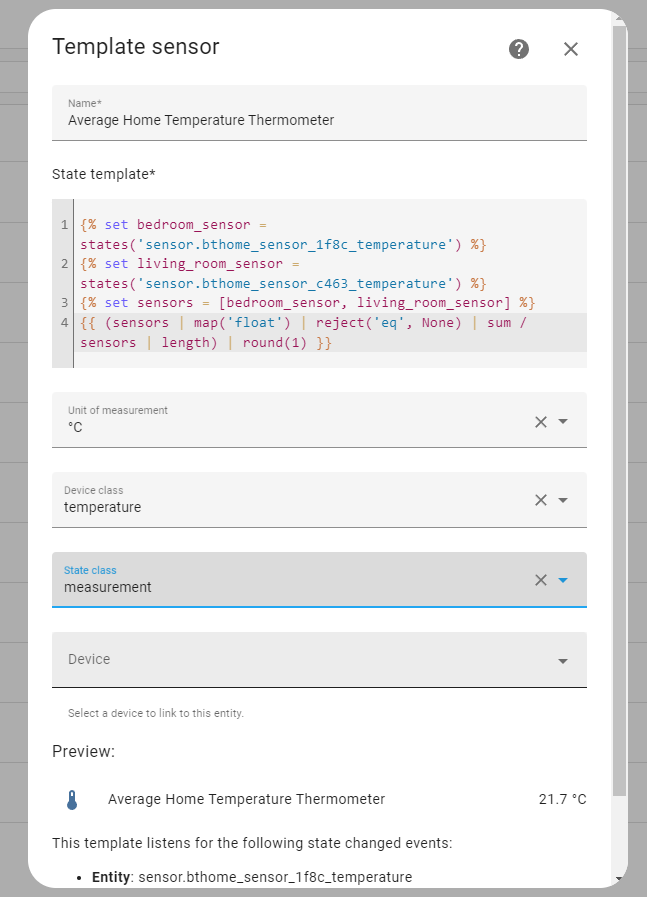
Head over to Settings > Devices & services > Helpers and click on the Create Helper button. Select the {} Template option > Template a sensor option from the modal and fill out the fields:
- Name: Average Home Temperature Thermometer, or whichever name you prefer.
- Unit of measurement: °C or °F
- Device class: Measurement
- State template: See the code bellow. It calculates the average temperature between the rooms.
|
|
Please use the correct entity Ids for your temperature sensors. If you have more sensors just register a variable which targets the proper sensor. For example we can add a guest room with its own sensor and the code would be:
|
|
After you submit the form, a new helper should appear in the helpers list. This is how your modal should look in the end:
Setting up the main heating toggle
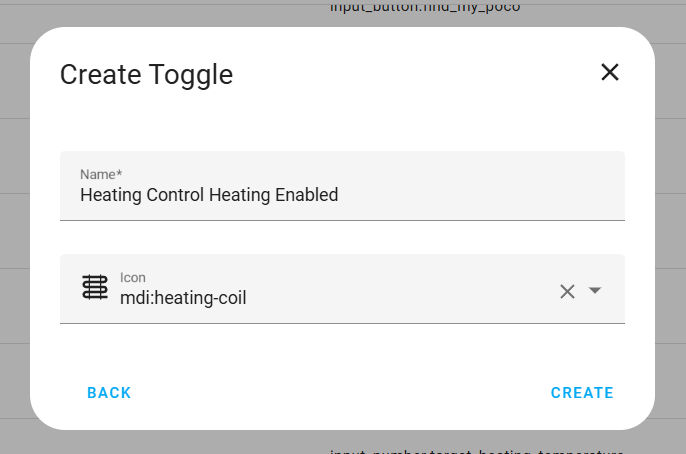
Same as before, go to Settings > Devices & services > Helpers and click on the Create Helper button. This time select Toggle, set the name and the icon to your liking:
Setting up the temperature slider
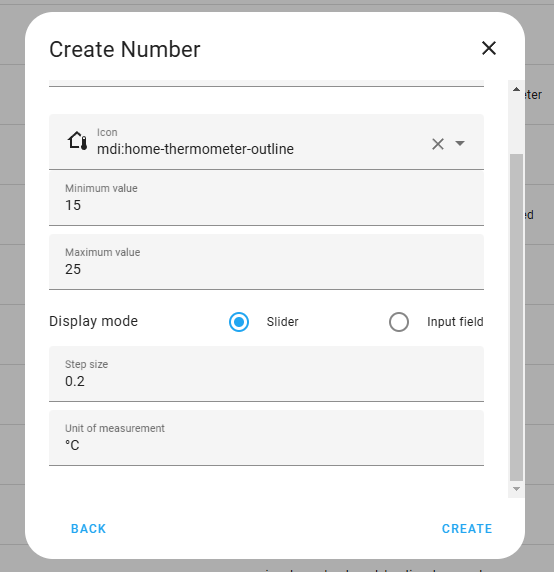
Go to Create Helper > Number, set the temperature limits and other properties to your liking:
Setting up the target thermometer picker
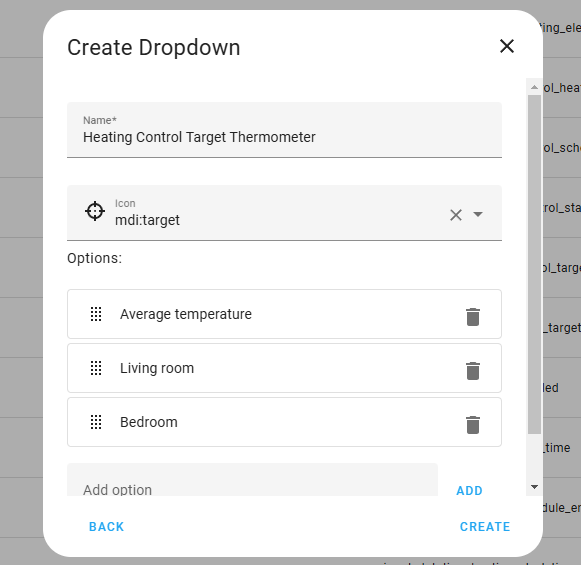
Go to Create Helper > Dropdown, and add the the options for thermometer selection:
Setting up the schedule toggle
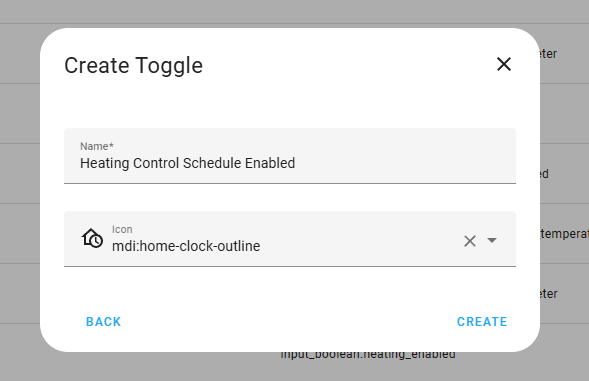
Go to Create Helper > Toggle, and add your toggle:
Setting up the schedule start time selector
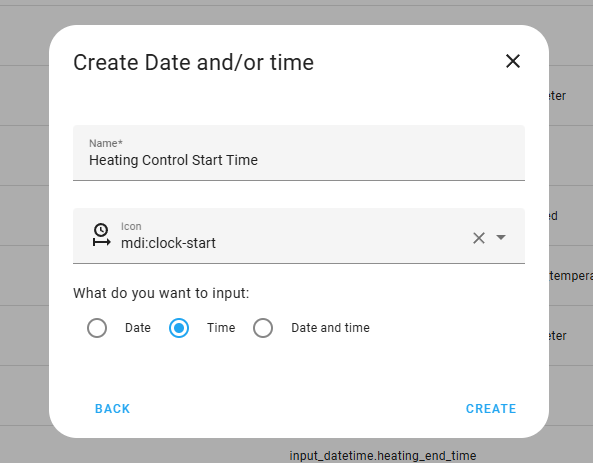
Go to Create Helper > Date and/or time, and add your date time selector:
Setting up the schedule end time selector
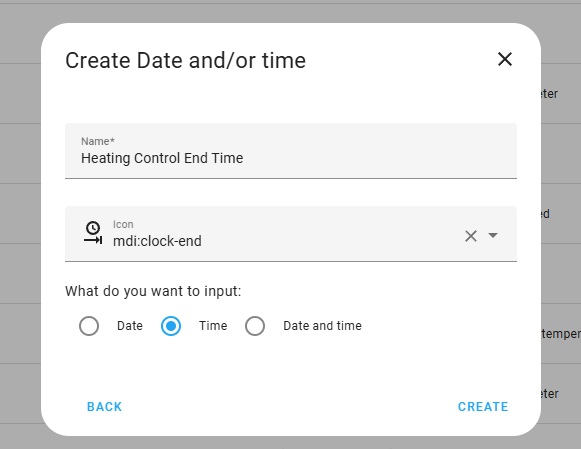
Go to Create Helper > Date and/or time, and add your date time selector:
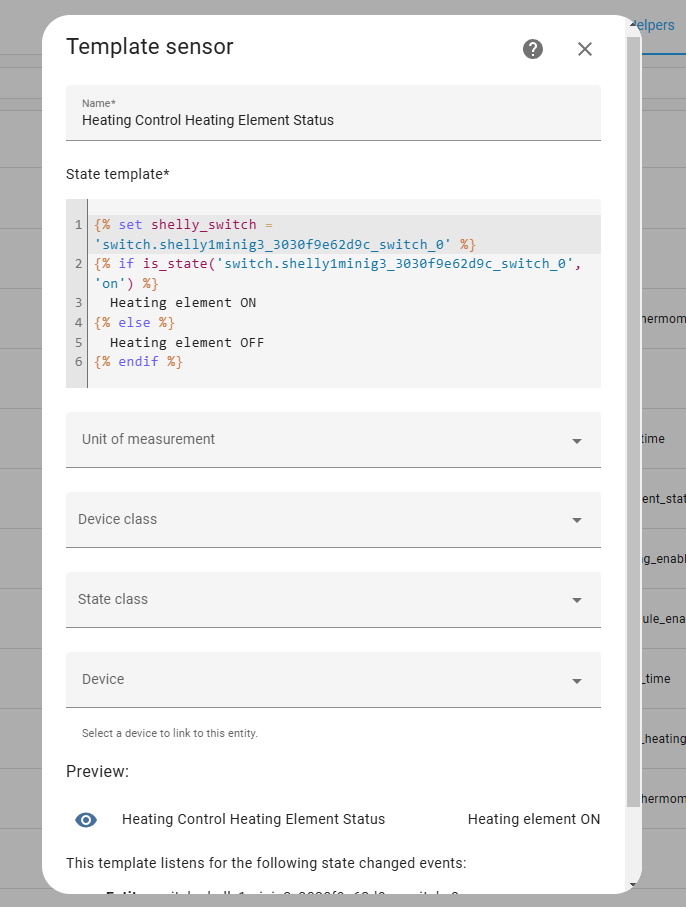
Setting up the heating element status
Go to Create Helper > {} Template option > Template a sensor, and create your template sensor, afterwards edit the template to change the icon to your liking:
|
|
Adding the new controls to the dashboard
On your dashboard of choice click on the Add Card button and select the Entities card. We can now add all the entities we previously made and set custom labels and icons for each. If you want to copy my exact design click on the Show code editor button and paste the following:
|
|
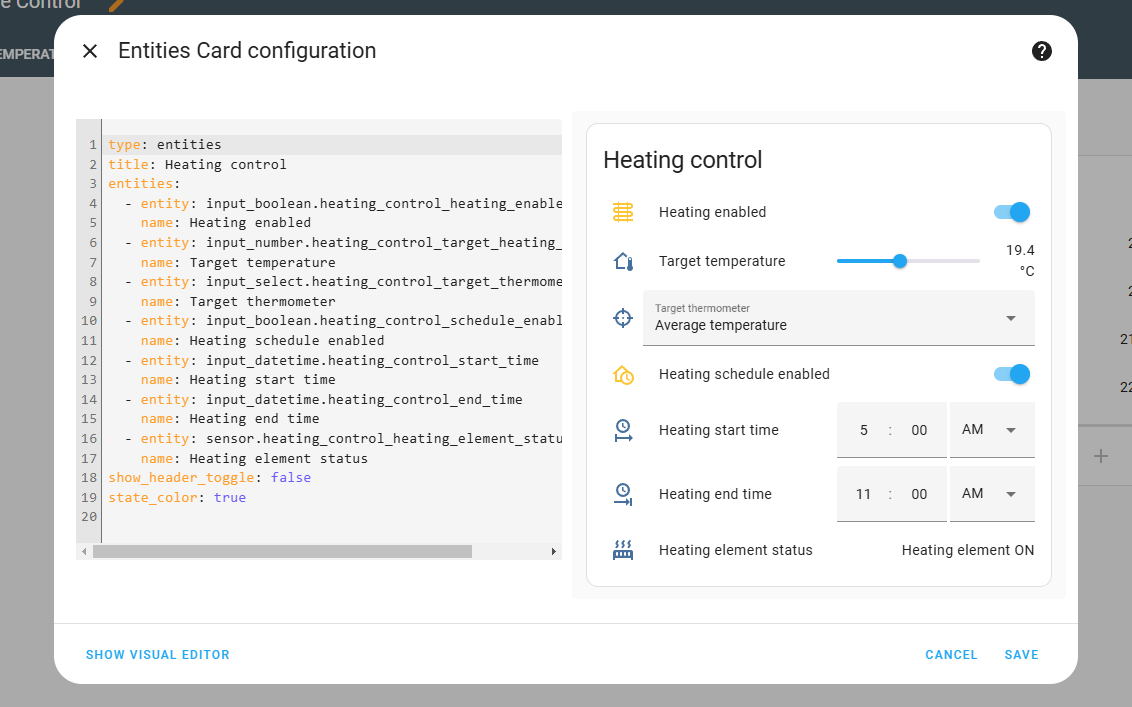
Be mindful to set the correct entity Ids in case you named them differently and save the configuration.
The second card I have on the UI displays the temperatures. You can add your thermometers to the UI through the entities card, (there is no need to add helpers) and this pretty much completes the final UI.
Setting up the automation
The core of the system is the automation which will turn the heating ON and OFF depending on the apartment temperature. The automation will run every minute, analyze the temperature parameters act accordingly.
To set it up, create an empty automation and open the YAML editor for it and paste the following code:
|
|
At the bottom of the automation are the variables which you will have to modify to match your sensors, since the entity Ids for the switches and the thermometers will differ from mine. Test your automation by listening to the relay of the Shelly click when switching between ON and OFF.
Final touches
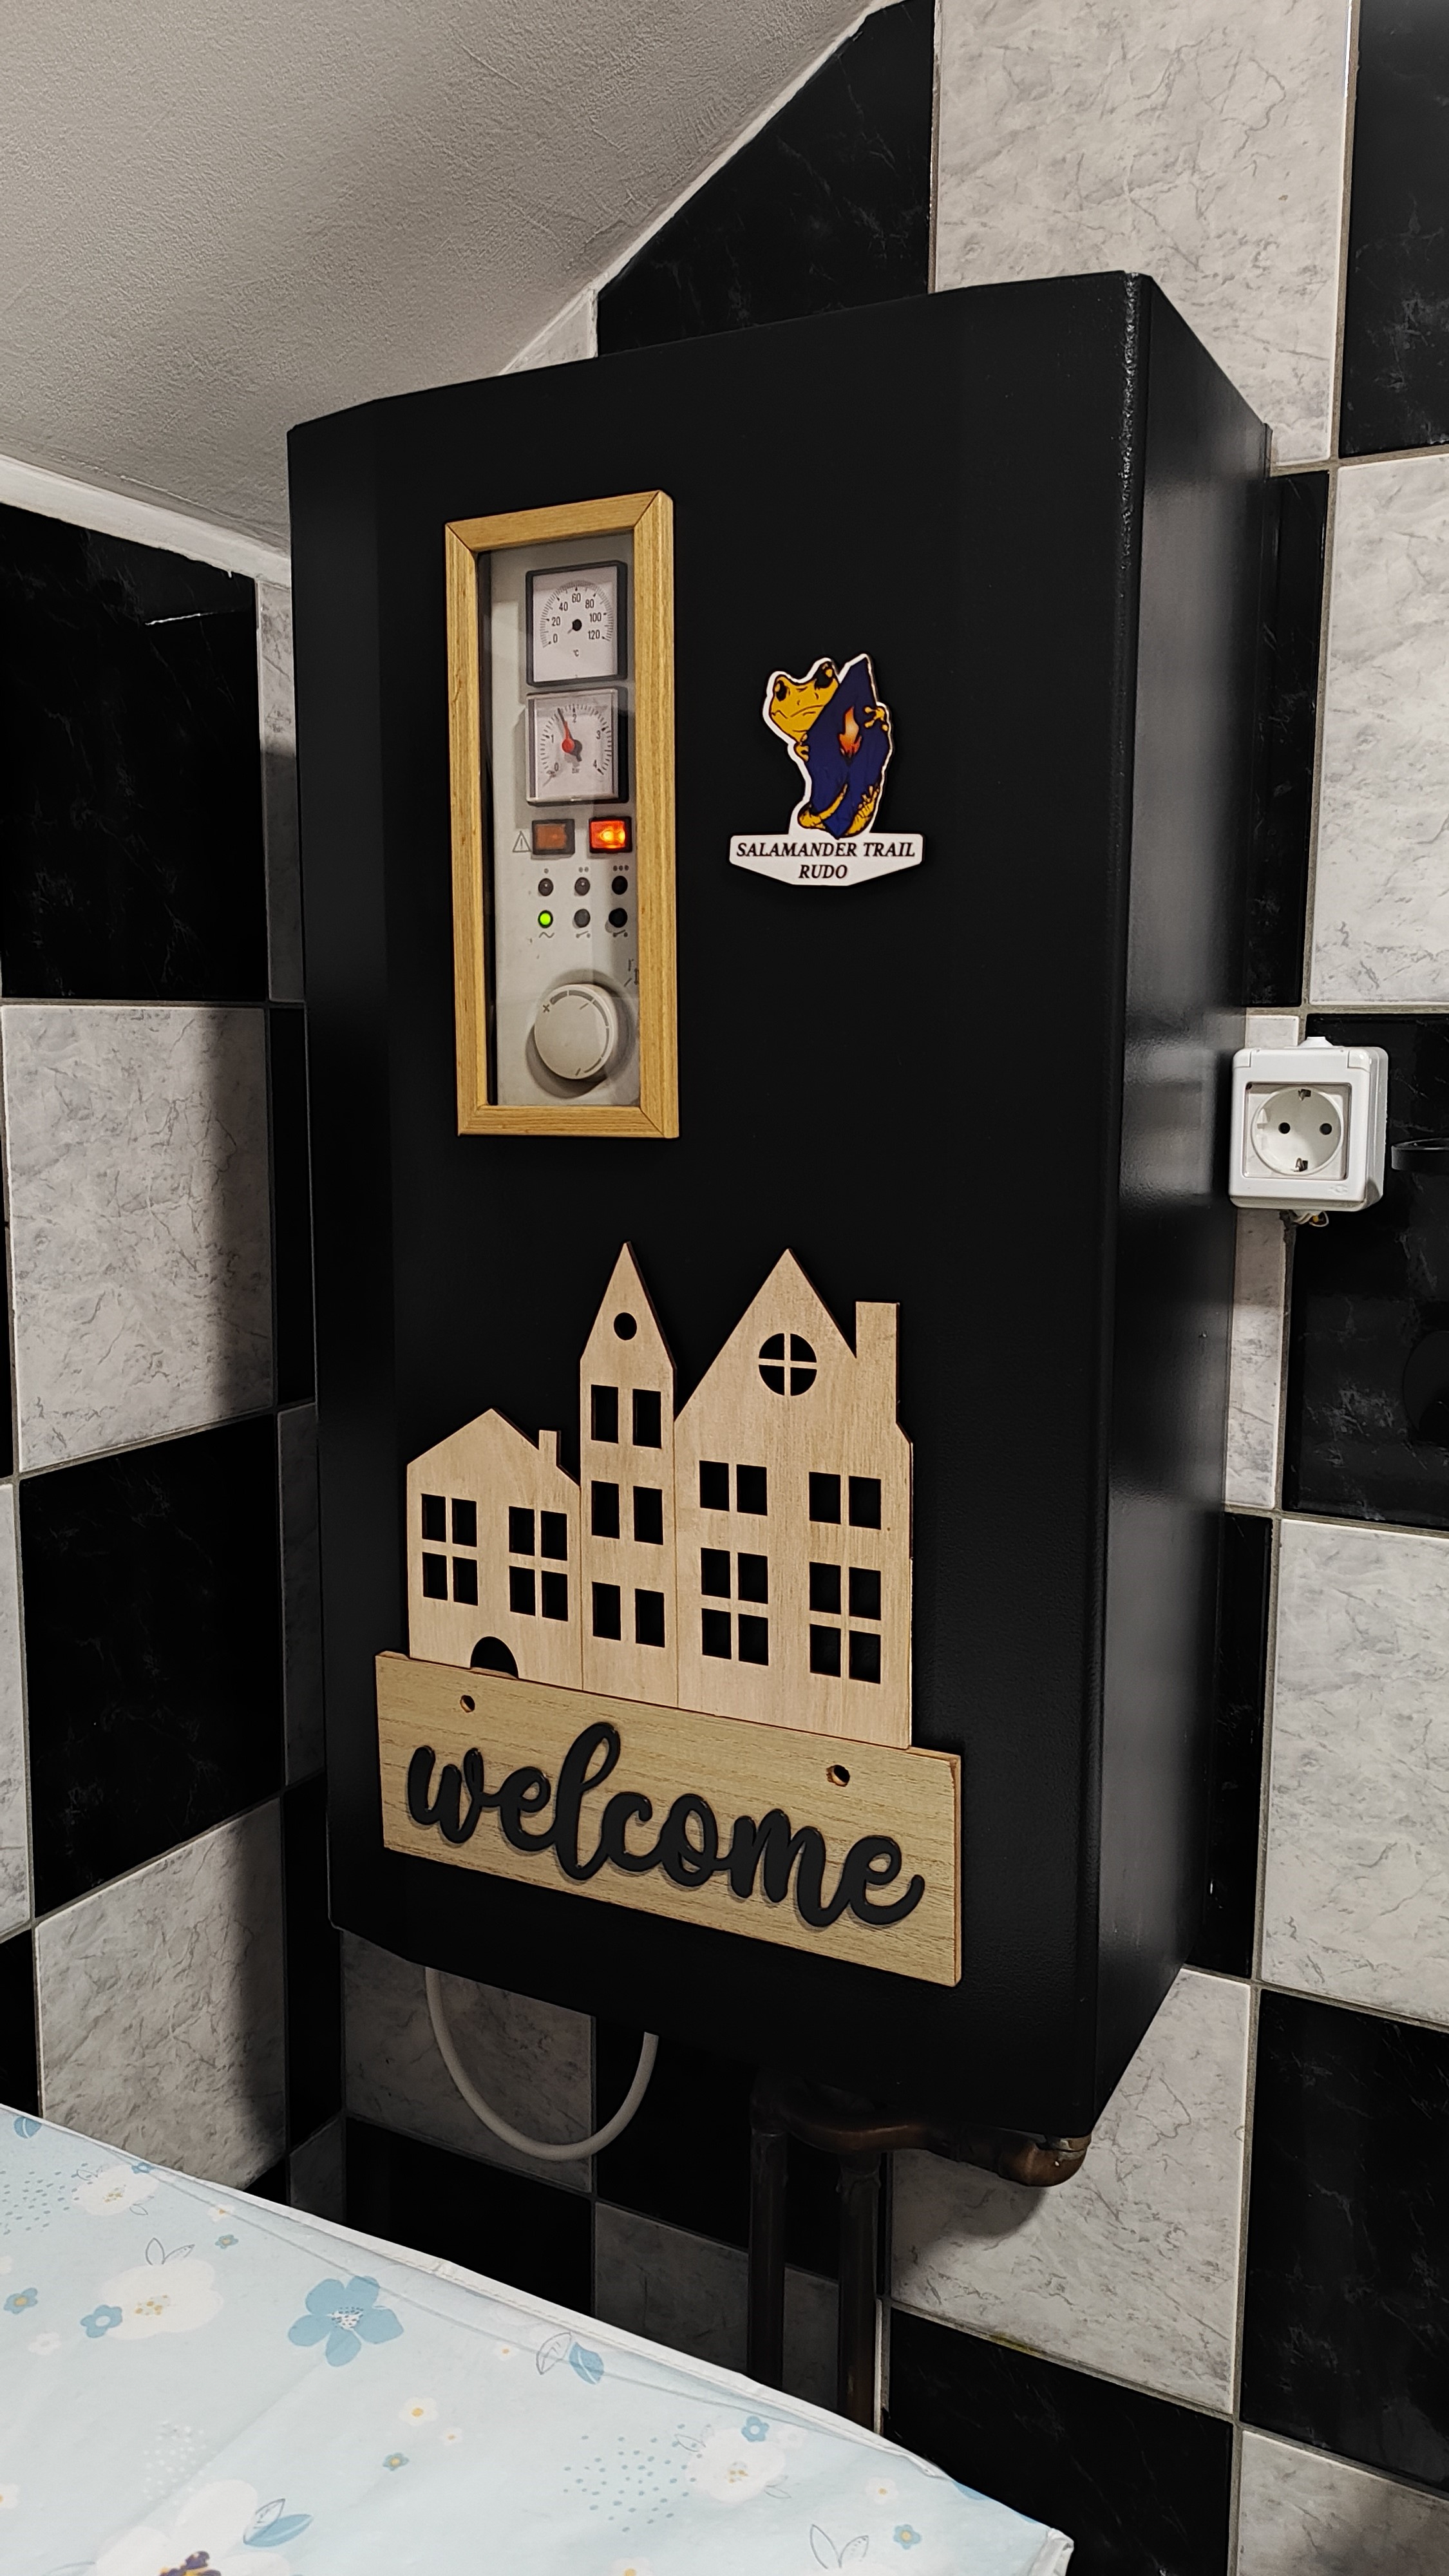
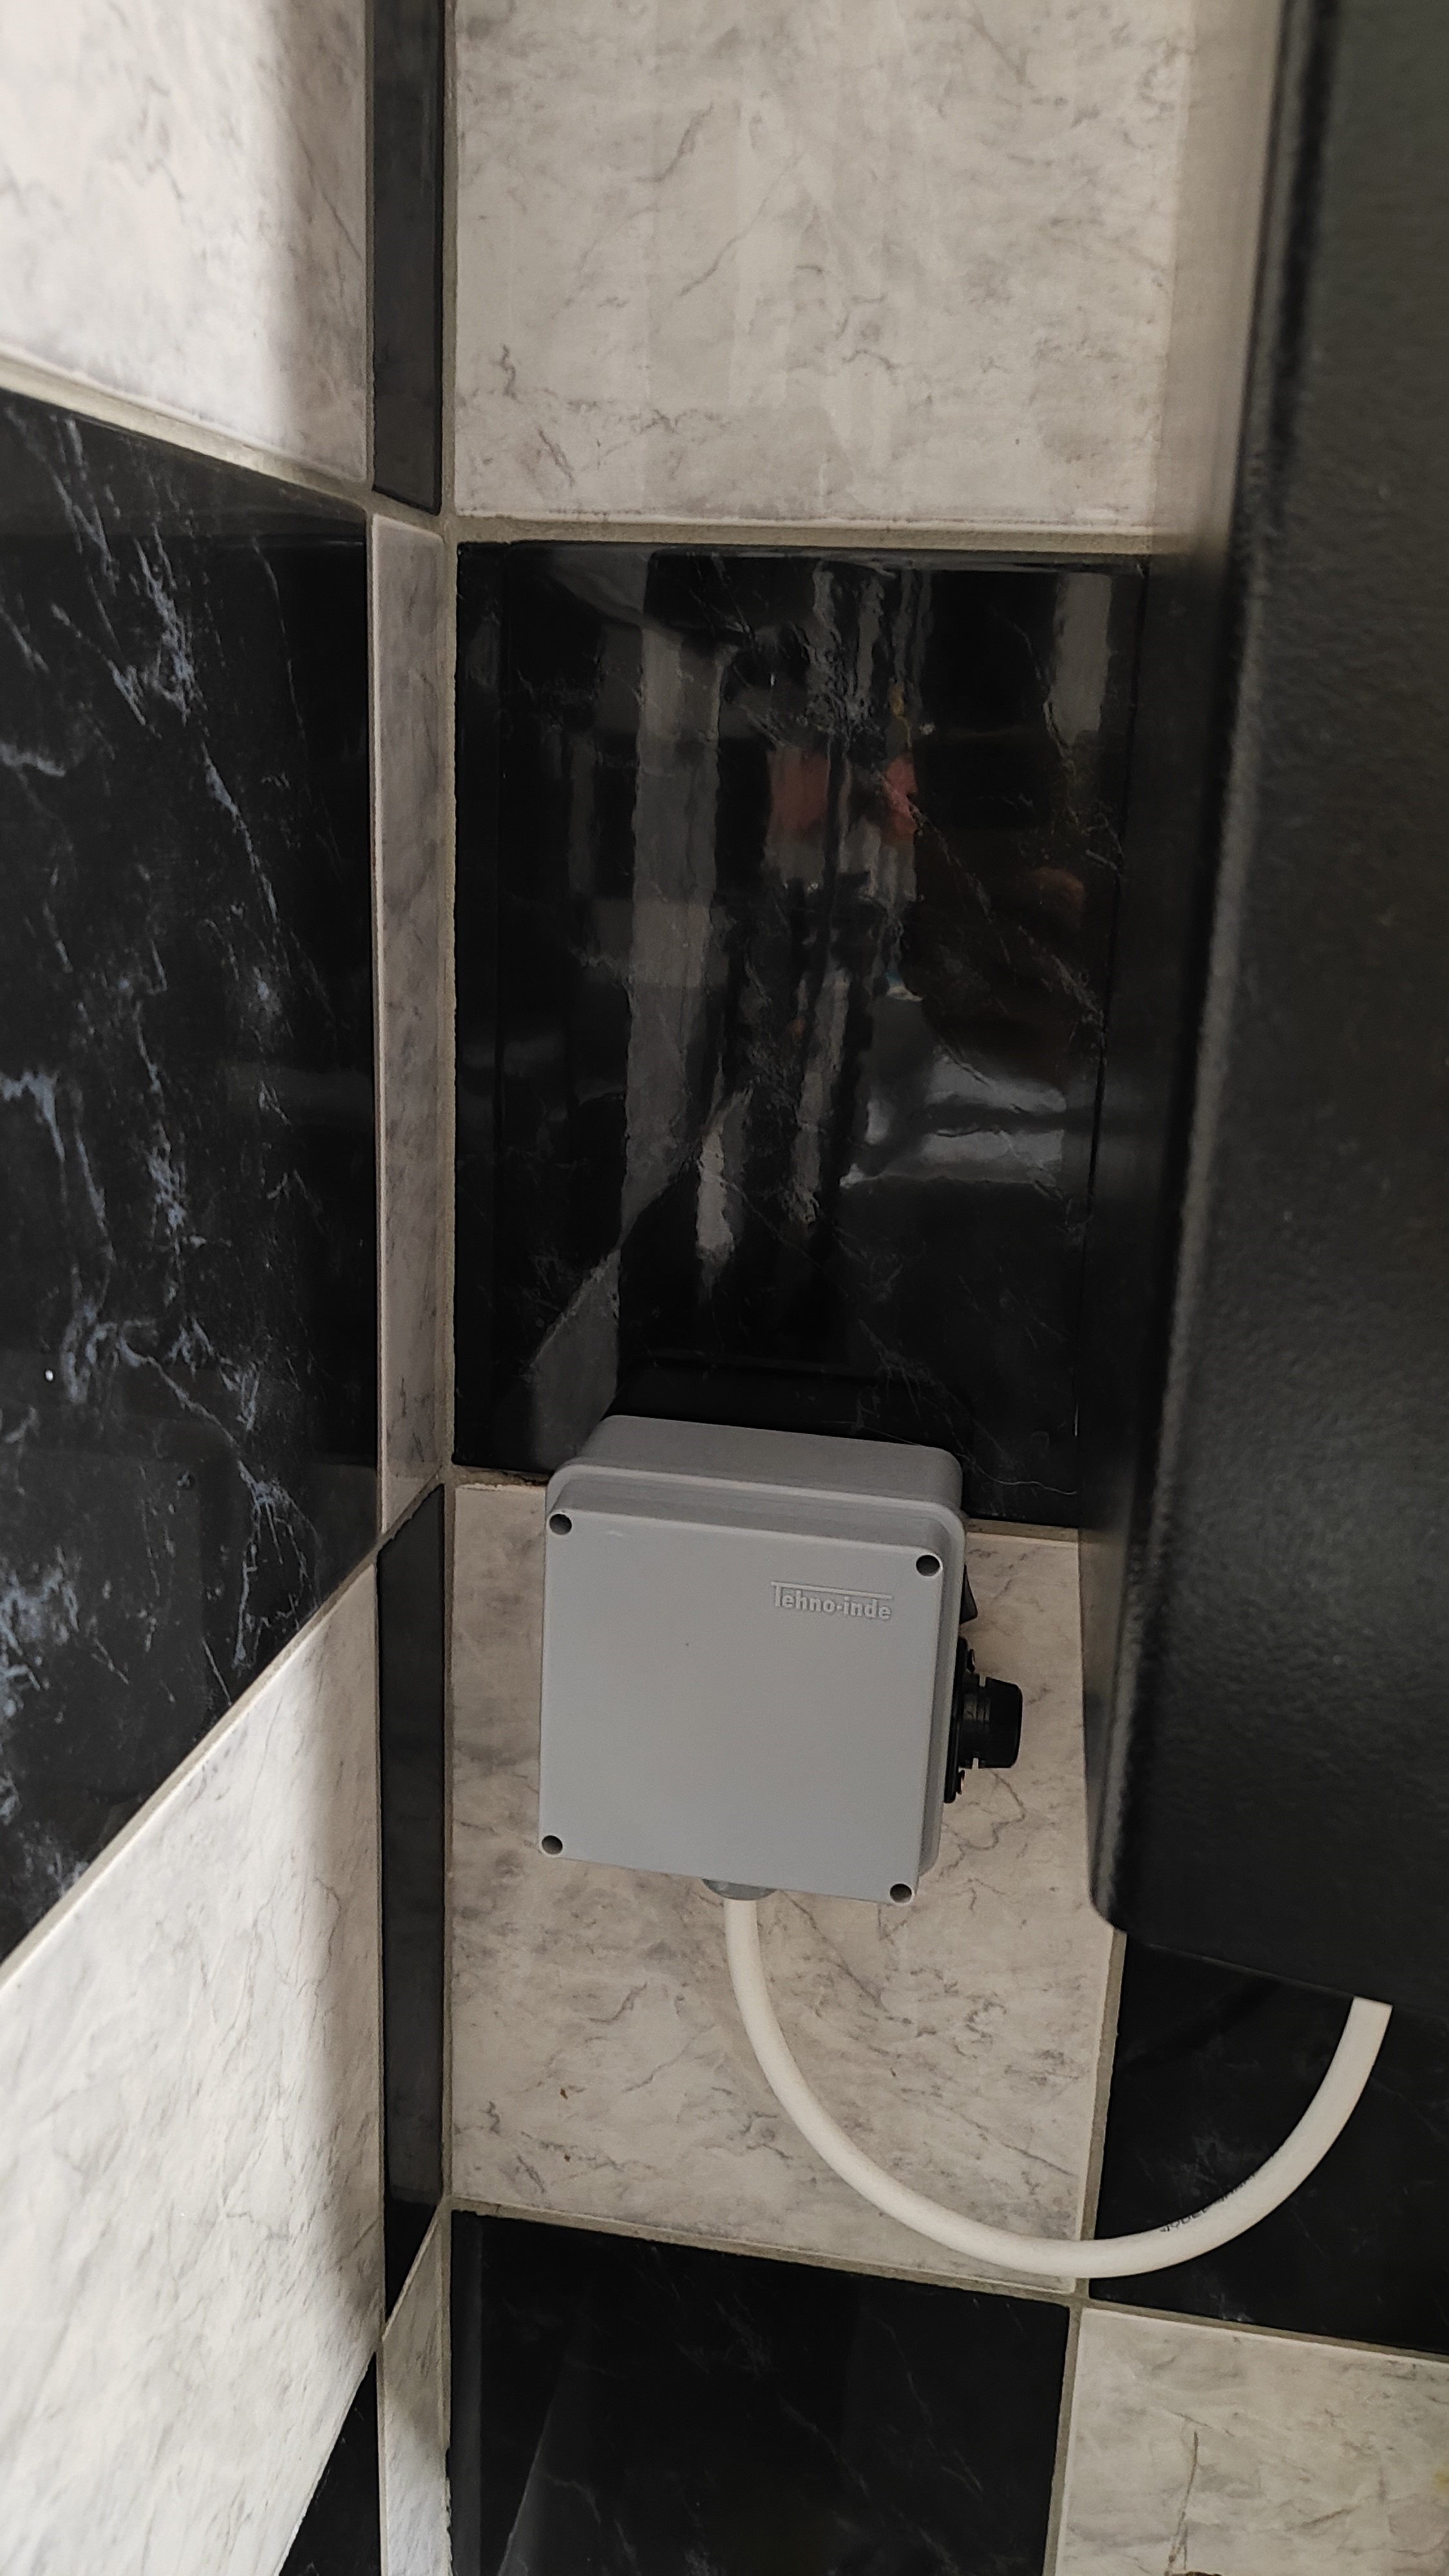
With the automation tested and set up, it was time to decorate. I straitened out the bumps in the case and got to painting the case.
Details of the final finish:
- The paint job includes two layers of black base metal paint followed by a clear coat. Before applying the clear coat the box was sanded with 220 grit sand paper to remove any bumps in the paint.
- I’ve also bought a cheap picture frame and cut it down to size to cover the controls. The transparent picture frame plastic does a great job at keeping the dust away from the controls.
- The picture frame and the decorations are secured to the block with neodymium magnets. This allows me to easily remove them when changing the settings or cleaning the heater.
- The new thermometer is secured right next to the heating block, and out of sight.

Results and Final Thoughts
The system has been operational for two months already, with no issues so far. The Shelly is a reliable switch and I expect it to operate properly for many years to come.
As for possible improvements, those would include improving the UI and the resiliency of the system in the event one or more thermometers fail, or run out of battery. I am not too worried though because the old physical thermostat is still there as a safety backup.
That is it, feel free to reach out, ask questions or suggest improvements to the setup. I would be most grateful if you spot and comment on any potentially dangerous electrical design choices I made.
Thank you for reading this far!
